|
31st May 2008
Jane: It’s the last day of half-term, and I’ve just been reading an article about how British children have the lowest level of wellbeing in 21 developed countries, according to UNICEF. Our children are apparently now almost captives in the home – the distance they can roam without an adult has dropped by 90 per cent in 20 years – and spend hours on their computer or watching TV in lieu of real adventure and challenge. It's true: when I was nine, I remember taking two buses to school across the city by myself, whereas I still walk my nine-year-old (who could easily handle it herself) the short journey to her classroom door every day. As parents get busier, the level of communication between adult and child becomes functional – ‘It’s time for tea’, ‘Is your bag packed for school?’, ‘Do this, do that’ – apparently making interaction a one-way ticket which increases children’s stress levels and makes them feel constantly bossed around. The answer, says the author, is to put children under less pressure to achieve and give them more room to explore, play and create…
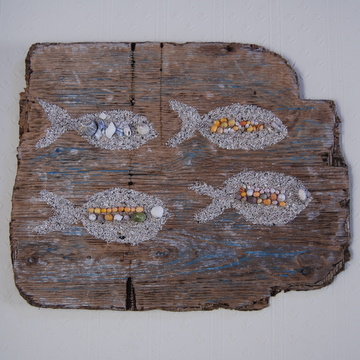
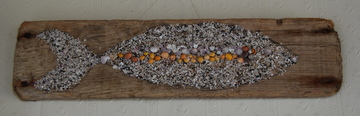
Create is a word I like and to improve our worst-in-the-developed-world wellbeing, we decided to create some natural sculptures with wood, sand and shells. We beachcombed loads of smooth pieces of driftwood, some large, some small, plus shells of all colours and shapes. You can make any mosaic you fancy – fish, snails, trees, dolphins, cows, whirls, patterns – all you need is some clear wood glue and a paintbrush.
Take the driftwood, banging a hole at each side with a hammer and big nail if you want to hang your sculpture later. Outline your chosen shape with a pencil, then paint inside the edges and fill in the middle with a layer of glue. Press an even thickness of sand on to the glue – if you’re clever you can stick darker sand around the outline to give a solid edge to the shape. Shake off the excess sand and leave to dry for a while. Then decorate your shape with shells or flotsam. Paint on another thin layer of glue where you want to give eyes or fins, or outline a backbone with a pattern of tiny coloured shells. Allow to dry. Then hang on your wall to remind you that it’s good to explore, play and create.
25th May 2008
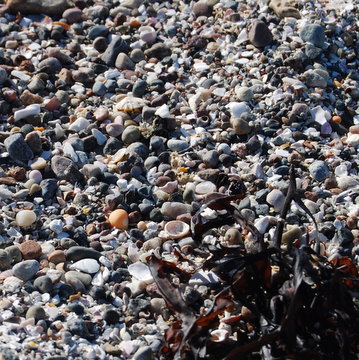
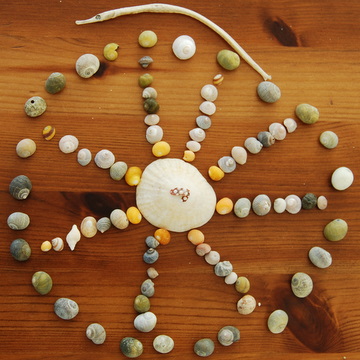
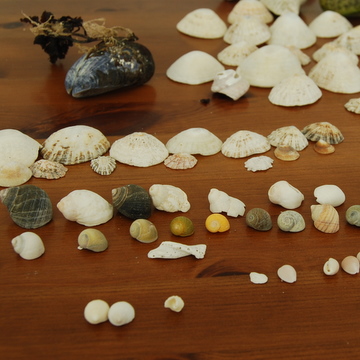
It's half-term and we're on a quiet Scottish island where the sand is white, the sea is deep turquoise, and the beaches are full of shells of incredible shapes and colours. We're staying in a house with shell art on the walls and a beach 20m away, so decided to see what we could find in a couple of hours' beachcombing. Everyone took a bag and picked up the shells they liked best, then brought them home and laid them out on the table to make instant homemade art. Carla arranged hers in the shape of a wheel, and also found a pipefish, which used to be rare but you see more often now...
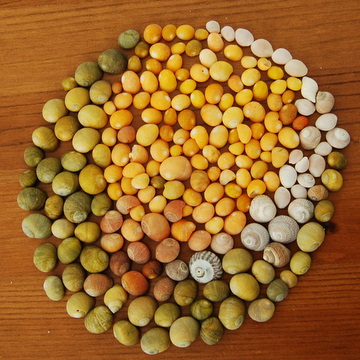
Mike collected tiny yellow and green flat periwinkles and packed them into a circle...
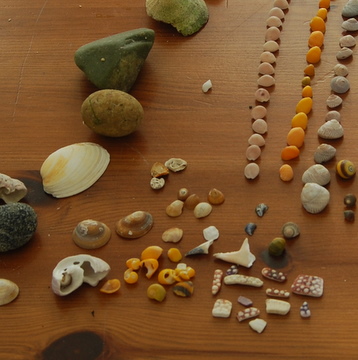
Joe collected small fragments of edible sea urchins, top shells, periwinkles, and unusual stones...
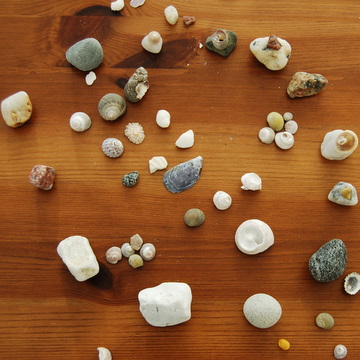
Maudie went for white and blue and arranged them in double decker stone sandwiches...
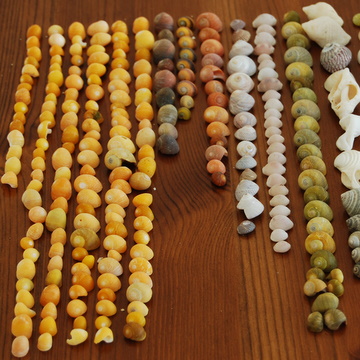
Tamsin picked periwinkles of all colours, plus some white cowries, and arranged them in bold lines of colour...
Edie liked pyramids of white limpets, rough periwinkles, and also found a crusty old mussel. It's sunny now but on the next rainy day we're going to stick the shells onto flotsam and driftwood and make artworks to put on the walls... 17th May 2008
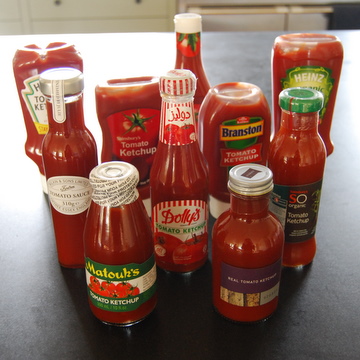
Tamsin: I have always been keen on tomato ketchup. In more youthful times I was partial to a ketchup sandwich, best made with white bread, thickly spread with butter and finished off with the layer of ketchup. So when my friend Helen suggested we did a ketchup tasting test, I was all for it. We decided what was needed was as many different bottles of the red sauce as we could find, together with a big bowl of chips and chipolatas to dip in.
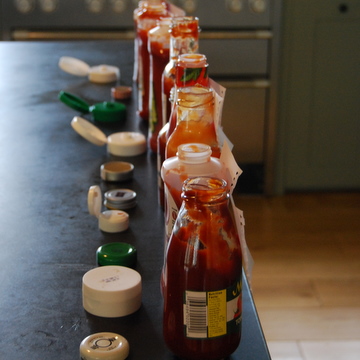
Unlike the hot chocolate tasting we did recently (see blog 13th January 2008), we decided this should be a blind taste test. As a lifelong lover of Heinz, I had no doubt that – blind or not – I would be able to identify my favourite sauce and would have placed a bet on it if someone had challenged me.
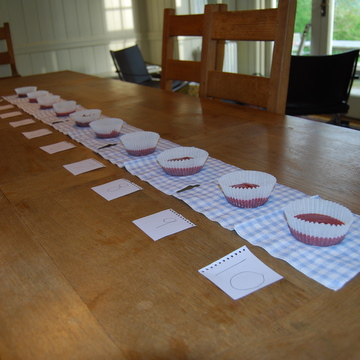
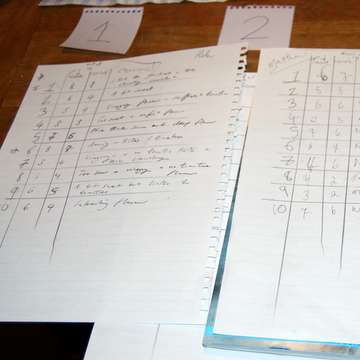
We labelled the bottles 1 to 10 and then squirted some ketchup from each bottle into a muffin case and laid them out in the middle of the table.
Chips in hand and score sheets at the ready, we began to dip, chew and scribble. Early on it became apparent to me that picking out my beloved Heinz was not going to be as easy as I'd thought. Some sauces were definitely not contenders being too acidic or sweet and therefore a bit unpleasant while others were richly spicy and (although not Heinz) definitely hit the spot. Even so there was enough uncertainty amongst the rest that I began to be glad no bet had been placed.
Top came a ketchup that had been bought in the Caribbean - Matouk's - sweet and intensely spicy. Second was a brand called Dolly's, third, much to our surprise, was Branston, with Heinz coming in fourth. Sainsbury’s low-salt and sugar took tenth or last place. The results were a bit of a shame since we only have one bottle of the Caribbean winner. Alternatively, that could be seen as an excuse to book a holiday in the sun sooner rather than later.
11th May 2008
Jane: Just been with Edie’s class on a school
trip to Grafham Water, a nature centre where the children had a fantastic day
mountain biking, orienteering, climbing on low ropes and following a trail
blindfold through the woods. In one of the quiet moments (there weren’t many)
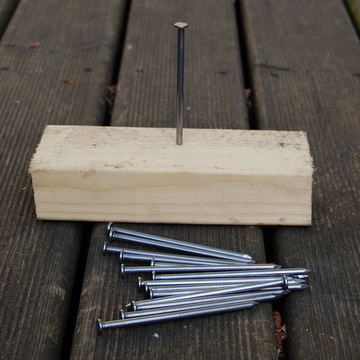
our lovely, friendly instructor John set us a challenge: could we use our skill
and initiative to place 14 nails on top of a single nail banged into a block of
wood? He gave us the equipment, and we divided into groups to solve the
puzzle. It was baffling. We tried turning the block
upside down then propping the nails beneath – the block fell over and anyway
that hardly counted as being ‘on top’ of the nail. We tried to build a nail
tower on the head, but that was as unproductive as guessing how many angels can
dance on the point of a needle – they all just rolled off. Eventually, our
group used our skill and initiative to… ask another instructor for the answer.
He sweetly showed us how:
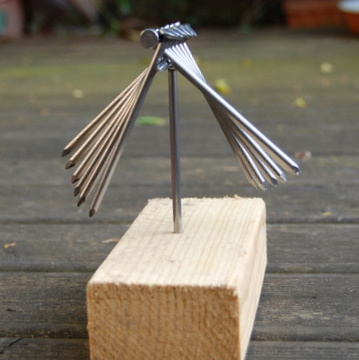
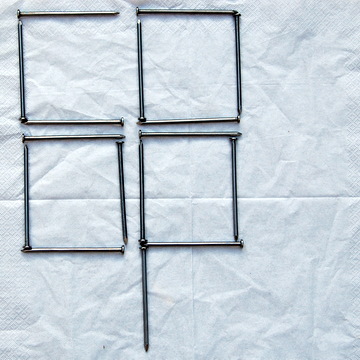
First, you lay a nail on the ground. Then you place the other nails on it at right angles, fanning out each side as if creating the oars in a Viking longboat. The nailheads have to butt tight up to each other, and to the head of the bottom nail. When you have six ‘oars’ each side (that’s 12 nails) on top of the bottom nail, place the final nail on top, with its head at the opposite end to the bottom nail. Then holding the two outer nails, gently, gently lift the whole structure, keeping the nails together as tight as possible. Balance the bottom nail on top of the single nail on the block. The structure will stay there because the weight of the nails on either side works as a counterbalance, holding all the dangling nails in place.
Then
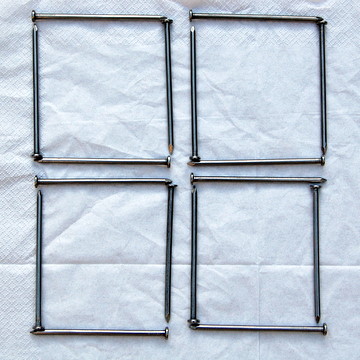
Edie’s teacher came up with another brainteasing nail trick. She laid out four squares of
nails and asked us to turn them into a shop by moving just one nail. Some of
the children tried to make a shop’s floor plan, others tried to spell the word
‘shop’. Again, we admitted bafflement.
The
answer was to take the right-hand nail from the first square (to leave a ‘C’)
and put in under the last square (to make a ‘P’) so the word spelled is ‘Co Op’
– which of course, is a shop. Very clever indeed! 8th May 2008
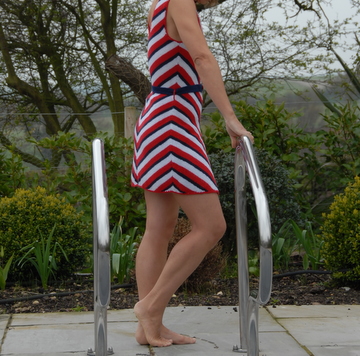
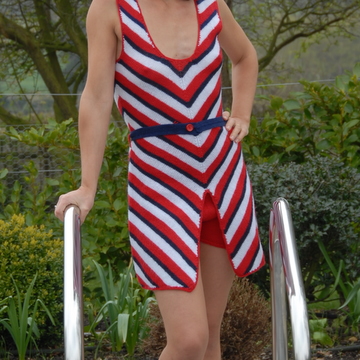
Tamsin: With the sun blazing down on us I thought it was time to do the blog on the knitted swimming costume. This project began in September 2007 (see Jane’s blog) when we had the mad idea of recreating a knitted garment – a skirted swimsuit – from the past. After purchasing the wool and a pair of rather narrow-looking knitting needles, the burden of our ‘inspired idea’ was weighing heavily upon us. Were we really going to have to knit this thing?
Luckily I work in a place which is supported by an amazing group of women. Many are twice my age and remember the days when if you wanted something you had to have the skill and patience to make it. So I put out an SOS and was rewarded with Andrea who, undaunted by the rather skeletal knitting instructions taken from a book, proceeded to knit this authentic 1930s' red, white and blue patterned swimming costume on those very small needles. I feel the costume ought to be christened or rather baptised by being immersed in water, but it is such a beautiful reminder of times past that I have decided it should be exhibited in pristine condition in the museum instead. It's lucky for me, as I have been warned about knitted swimming costumes from those who can remember wearing them first time round. They tell tales about how the wool sagged so much when wet that nothing was left to the imagination – all decency was lost as you got out of the water. Having tried this swimsuit on, I can well believe it.
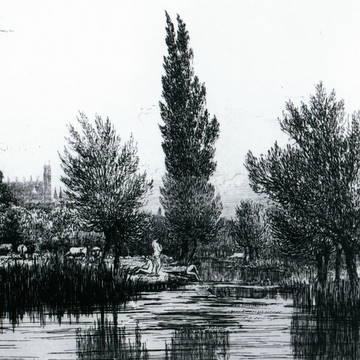
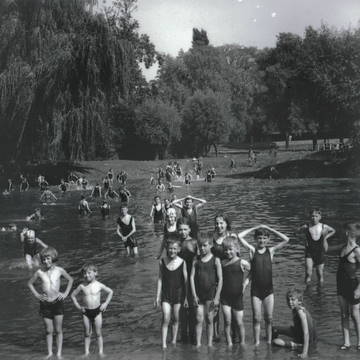
When the children were young and my mind seemed to have turned to mush, I signed up for a local history course. I fell in love with the research and discovery of the past life of our town. One of the topics I chose to research was outdoor swimming – I was brought up myself to swim in rivers and seas and have a great love for this activity. I then read Roger Deakin's book Waterlog and realised that there was a whole outdoor culture forgotten by our generation just waiting to be rediscovered. As I trawled through diaries, newspapers and photos a vibrant world opened up – water holes where children spent summer days paddling, river swimming where the sport of diving was of great importance, races with names such as ‘The Milk Race’ along the rivers, outdoor gyms on river banks, the struggle of women to claim a patch of the river for themselves, and the massive debate over whether men should begin to wear trunks for decency. I hope one day to continue this research and trace many of these forgotten watering holes – maybe the rivers are clean enough that our children can once again enjoy them, in their practical sun-safe, lycra-stretch costumes.
5th May 2008
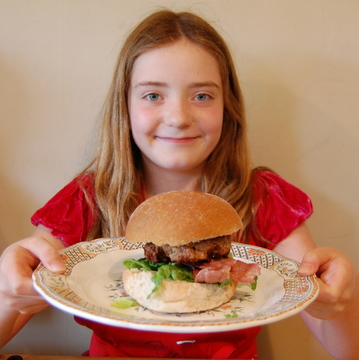
Jane: At school last week, Maudie learnt how to make burgers and was keen to cook them for us in a special Saturday night dinner before our weekly date watching the Nancies twirl and sing in 'I'd Do Anything' (we're all hoping that Jodie or Niamh will win). Maudie took our orders: we had a choice of burgers with bacon and cheese, lettuce and tomatoes, and she thought we'd also have corn on the cob on the side. She kept saying how easy it was – all you need is some mince (we used lamb mince), an egg and a squirt of tomato sauce.
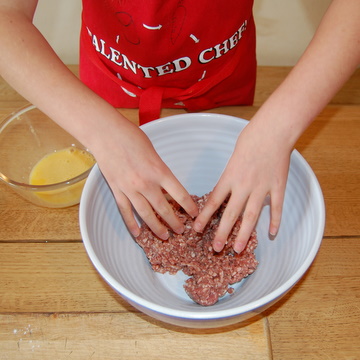
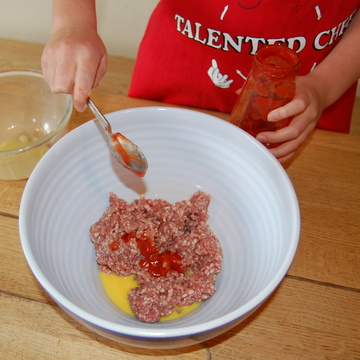
First she got a big bowl and put 500g of mince in it. Then she beat an egg and
poured it over, and added two tablespoons of tomato ketchup. (This is a good
time to add salt and pepper if you like.)
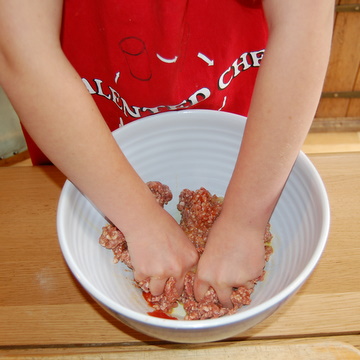
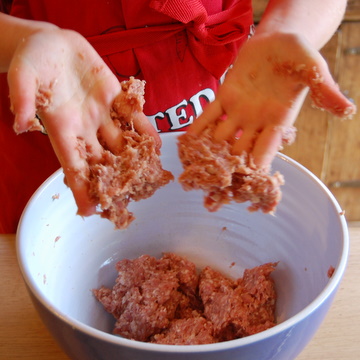
She squished the whole lot
together with her fingers…
…and got
lovely and messy.
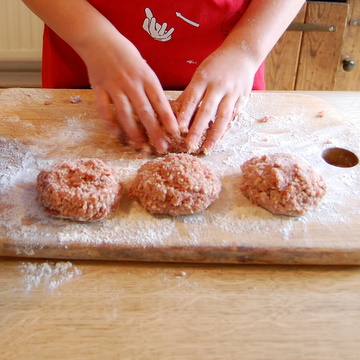
Then with
a bit of flour on a board, she rolled them with her fingers into four burger-shaped
patties.
She
heated some vegetable oil in pan, and fried them for about 8 minutes on either
side until they were cooked – the fat splashes a bit, so adults might want to keep an eye on this bit. Meanwhile the rest of dinner was got underway. The bacon went under the grill; the lettuce and tomato were washed and chopped; the corn cobs put on to boil; the buns were cut in half. Timing is everything and this was coming to a culinary crescendo at just the right moment!
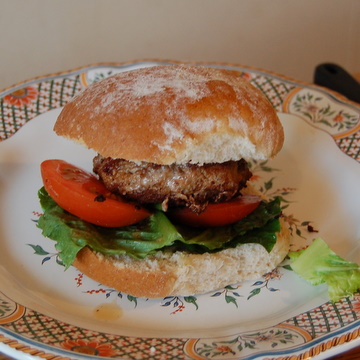
Two of us
wanted melted cheese, so Maudie placed our burgers on half a bun, slapped the
cheese on top and put them under the grill. Then she made up the other burgers,
one with bacon, put them on plates, and dished them up with the corn in a
separate bowl.
We all
sat down with sighs of delight to a meal that was delicious, especially with a
big squeeze of ketchup in the middle of the bun. This was the first-ever dinner
that Maudie has made us, and she enjoyed it so much she’s keen to do the whole
thing again next week. And so are we! |

|