|
3rd Dec 2009
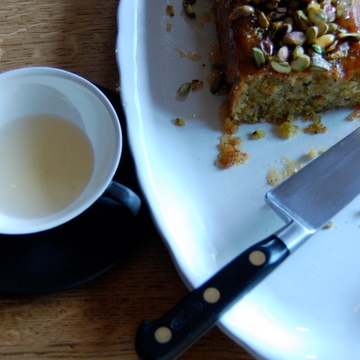
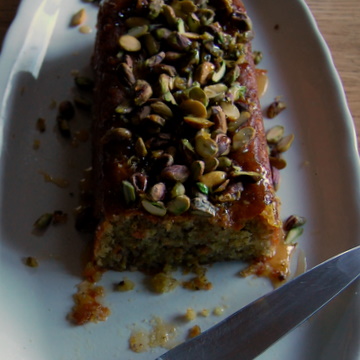
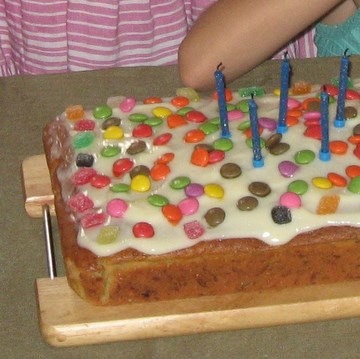
Jane: Is this the most delicious cake ever? The grown-ups all think so and, surprisingly given the general nuttiness and lack of gooey icing, the children are pretty keen too. This is a good rich winter treat, which can even be substituted for pud with a dollop of cream on top. When I’m feeling lazy I forget about the vanilla pod and the cake is just as tasty…
For the cake:
270 g unsalted butter 1 lemon 1 vanilla pod (optional) 100 g blanched almonds 120 g pistachios 250 g caster sugar 4 large eggs 40 g plain 00 flour For the topping: 1 lemon 50 g caster sugar 60 g pistachios Heat the oven to 150 degrees C/Gas Mark 2. Line a loaf tin 22 x 12 x 6 cm deep with greaseproof paper, and grease well with 20g of the butter. Soften the remaining (250 g) butter. Zest the lemon. Split the vanilla pod (if using) and scrape out the seeds. Grind the almonds and pistachios together (I use the hand blender with which I mush up baby food). Beat the butter and sugar together until fluffy. Beat in the eggs one at a time. Add the lemon zest, vanilla seeds (if using), then fold in the nuts and flour. Spoon into the prepared tin and bake for about an hour (start checking after 45 minutes). Push a skewer into the cake and if it comes out clean, it’s ready. Leave to cool in the tin, then turn out. For the topping: Zest and juice the lemon, put both into a pan with the sugar, and boil until thick (a few minutes). Halve the pistachios and stir into the sugar sauce, then pour the topping over the cake. This is taken from River Café Cook Book Easy by Ruth Rogers and Rose Gray (though I got it from a Guardian supplement of the same name, in 2003!). 27th Nov 2009
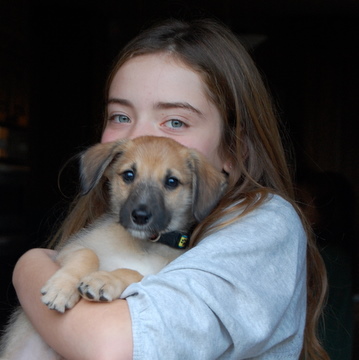
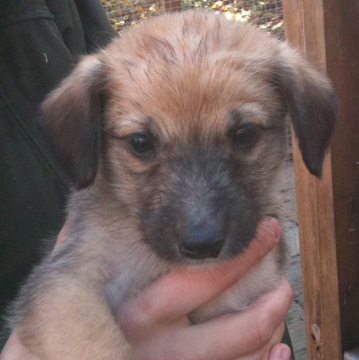
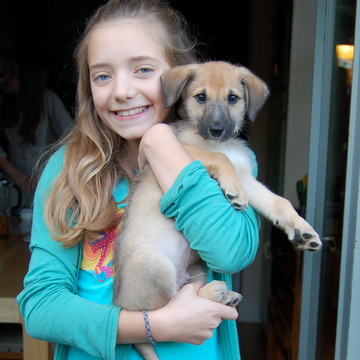
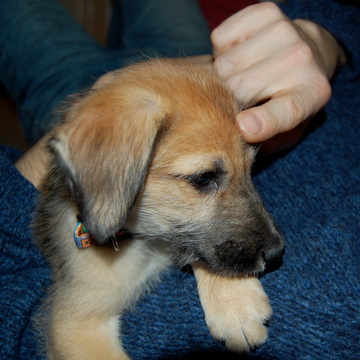
Jane: Just had one of the best birthdays ever, thanks to the arrival of George the puppy! I've wanted a dog for years, in fact Mal and I used to joke about our future wannabe hound 'Lyle the lurcher' (named in honour of singer Lyle Lovett). But it was never the right time. Until now. And George, hurrah!, is a lurcher (basically a sight hound crossed with something else): he’s part Saluki-greyhound-lurcher-Collie, so Gawd knows what he’ll turn out like.
Weirdly, as you can see, he looks more like an Alsatian in terms of colouring and muzzle, so we may have been sold a pup…
I’m sitting in my office writing this while he is fast asleep in his basket by my feet – sweet! The children think he’s fab (happily even taking part in the prolific pooper-scooping) and Maudie and I will be going to training classes in the New Year.
Yep, we’re all in love, L-U-V. Long live King George!
18th Oct 2009
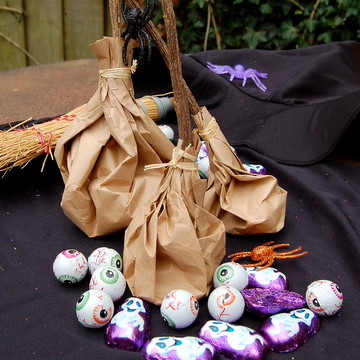
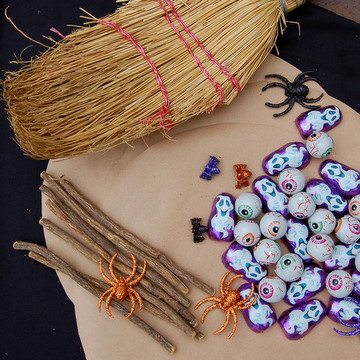
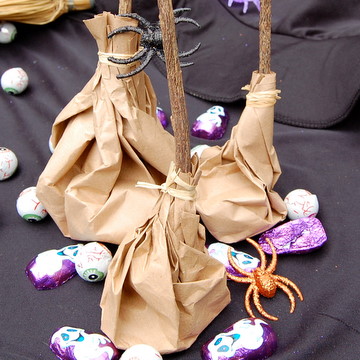
Jane: Here’s a funky way to dispense treats to trick ‘n’ treaters this Halloween – fill up a miniature witches’ broomstick with sweets. The brooms take just a minute to make: all you need is some brown paper, liquorice roots for the handles – they look wobbly and knobbly and very authentic (you can buy them in health food shops) – or just use twigs instead, some chocs or sweets, and a bit of raffia or thread to tie the broomstick together.
Cut out some large circles on the brown paper, at least 26 cm in diameter. Pop a few sweets in the middle of the circle.
Then grab the edges of the paper and gather them together at the top. Shake the sweets down and push on a table to give the broomstick a flat bottom, so it will stand upright. Stick one end of a liquorice root in the centre of the gathered paper, about 2-3 cm deep, then secure around the paper and root with a bit of raffia or thread.
Bewitching!
17th Sep 2009
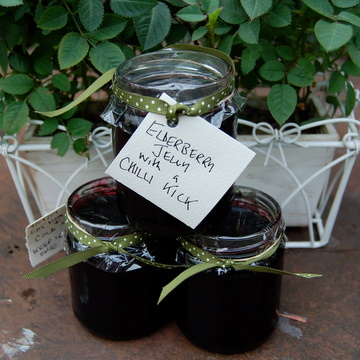
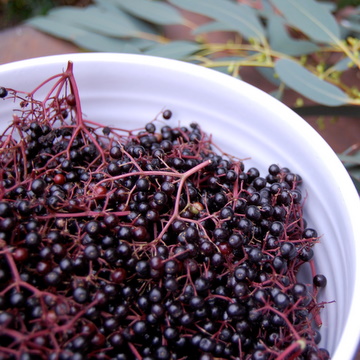
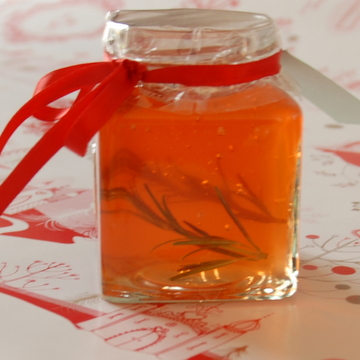
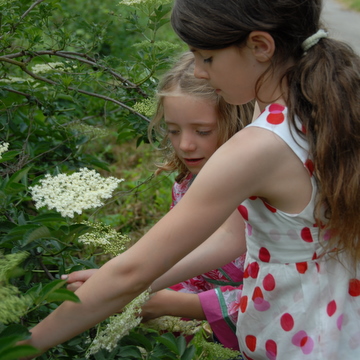
Jane: There’s a sprawling elder bush just over the river from us which has been dripping glistening black elderberries for the last couple of weeks, desperate to be made into elderberry jelly. So finally we obliged. But instead of spread-on-bread-jam I wanted to make something with a kick, that you could eat with cold meats and cheese. Aha! Just add chilli! Surprisingly, the kids loved this jelly, and what’s more it offers fantastic protection against winter colds and flu – take a daily dose as soon as you feel a sniffle coming on.
This made nine 8oz jars, so scale down as you need: 1.2kg elderberries, stripped from the stalks 4 Bramley apples juice of 3 lemons 2 tsps crushed dried chillies (this makes it pretty tangy but you can add more if you like) 1.5kg preserving sugar Put the elderberries in a preserving pan with the apples, chopped into quarters (including skin and cores – elderberry is not high in pectin and this helps with setting). Add the lemon juice, chilli and 1.2 litres cold water. Bring to the boil, and simmer for about 20 minutes, stirring occasionally, until the elderberries and apples are soft. Strain through a jelly bag, leaving to drip until all the juice is collected (you can throw away the pulp). Put the liquid into the pan with the sugar. Bring slowly to the boil, then simmer until it reaches setting point at 105ºC (use a jam thermometer). Spoon into sterilised pots, cover with a waxed disc and cellophane round. 18th Jul 2009
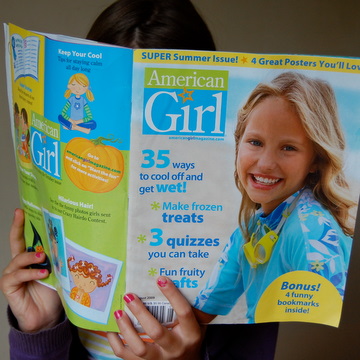
Jane: Mike has just delivered American Girl to us, a fab US mag quite unlike anything we have in this country (in so much as there are no boys/first kisses/fashion/my-best-friend-is-not-talking-to-me teenage traumas). Does that make it sound dull? It’s not. It’s full of energy, ideas, quizzes, crafts and funny, engaging features and stories. And cooking – this month frozen lollies of the most wacky and wonderful kind. The Peanut Brrrr was a step too American for us but we loved the idea of Flurry Float (frozen grape juice around vanilla ice cream to make a mivvi), Polar Pops – basically frozen Swiss roll on a stick, and Chilly Vanilly – fresh berries in frozen vanilla pudding.
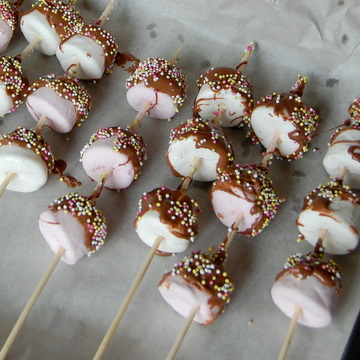
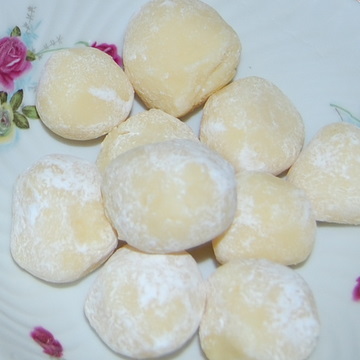
But today we choose to make Marshmallow Snowballs (see recipe here), which are super quick and easy. We started after a lazy, late Sunday breakfast, with everyone still in pyjamas, but by the time the Snowballs emerged from the freezer an hour later at 11.30am, to be dipped in chocolate and hundreds and thousands, we were fully dressed and ready to get marshmallow munching…
30th Jun 2009
Jane:
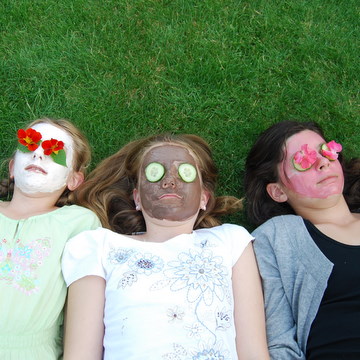
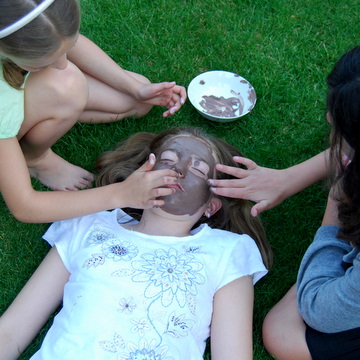
There’s something incredibly glamorous about face packs. I can hardly believe
I’ve just written that sentence (apologies to women everywhere) but it’s true:
in glossy magazines, you’ll always find a gorgeous gal with a gloopy green mud
face pack and cucumber slices over her eyes, looking trendy but tranquil,
really chilling out. I remember as a teenager thinking that this (the mud pack)
was the height of sophistication, so I wasn’t surprised when the girls started
badgering me to try some out some for themselves.
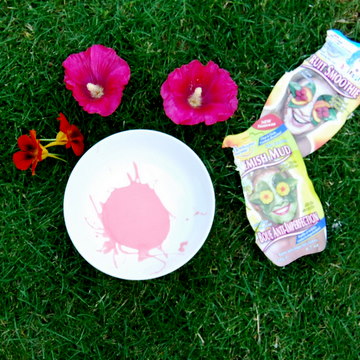
Boots
failed on the trendy face pack front so I went to Superdrug, where they have
loads in little sachets with pictures of funky Honolulu-inspired girls
with exotic flowers over their eyes. I bought a handful of them: peaches, lime,
lemon, raspberry, blue ice, smoothies – apart from the mud, it sounded better
than lunch.
The girls got to work,
squeezing out the sachets and applying the coloured gloop to their
faces.
Immediately things started
to go wrong. The stuff was too itchy, they couldn’t move their faces, they
wanted to scratch, it was in their hair, their skin had gone all tight.
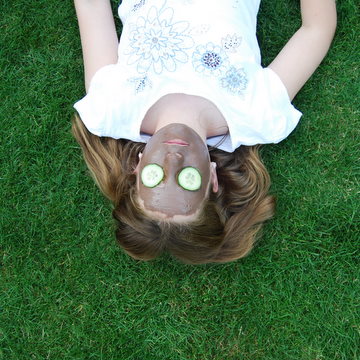
They
lay down for the picture in a row the garden. Not a good idea (‘Mum, there’s an
insect on my legs, get it off…’, ‘This grass is too itchy’ etc). I applied the
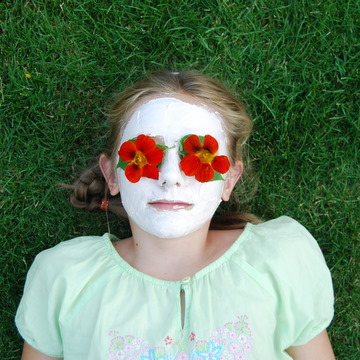
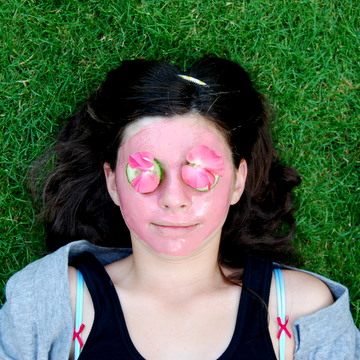
cucumber, petals and flowers over their eyes, hoping to soothe them, but they
started writhing around as if in enormous pain. Pollen was in their eyes, they
wanted to see, it’s too itchy, it’s horrible…
So they
got up, removed the eye whatnots, and went in to play Sims3 with their face
packs still on. We forgot about them until about an hour later, when Edie came
in with her face so stiff it resembled dried plaster of paris. It took ten
minutes in the shower to get it all off. So, did they like their face packs, I asked? No, they were horrible, they replied in unison (for the reasons outlined above). But afterwards, kissing them goodnight in bed, I said how wonderful their skin smelled, all fruity and clean, and they agreed. The glamour, you see, somehow lives on. 22nd Jun 2009
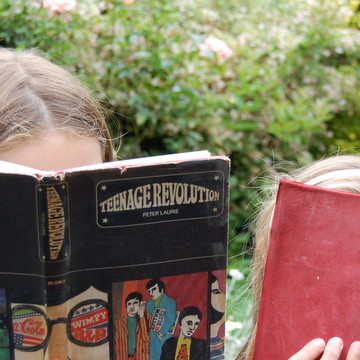
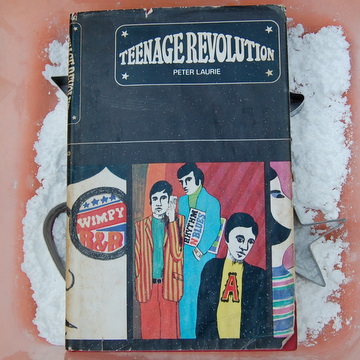
Jane: We’ve been buying a lot of old books recently, attracted by their funky covers and wacky titles, and by offbeat editions of old classics (new ones can look very dull by comparison). The books are beautiful but sometimes smell a bit musty and I was worried it would put the children off reading them. So I did a bit of research into de-pongifying them and found that bicarbonate of soda does the trick.
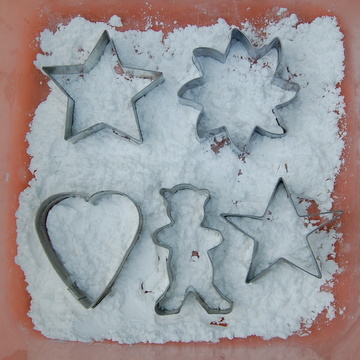
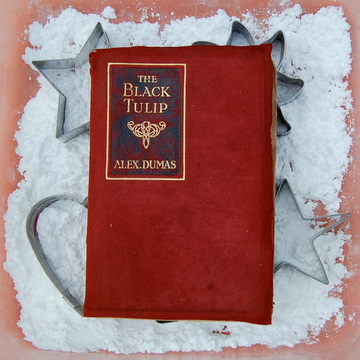
It’s easy-peasy. All you need an airtight container large enough for your book to have at least five centimetres space all around it, a raised tray (or see below) and some bicarb. Liberally sprinkle the bicarb into the bottom of the container (I used one of my plastic cake boxes) to a depth of one centimetre. Then you need a cooling rack or something raised and perforated to place the book on, so it doesn’t touch the bicarb and air can circulate around. Don’t buy something special – I used cookie cutters, and they worked fine.
Rest the book on the rack or cutters, close the lid tightly, making sure it is airtight, and leave. The bicarb will absorb most of the nasty smells within a few days, but particularly pongy books might need longer. (You can reuse the bicarb – just put another stinky book in the box.)
Funny though – when I handed the children the cleaned-up books and explained what I’d done, they said, ‘But mum, we really liked that musty old smell…’ 20th May 2009
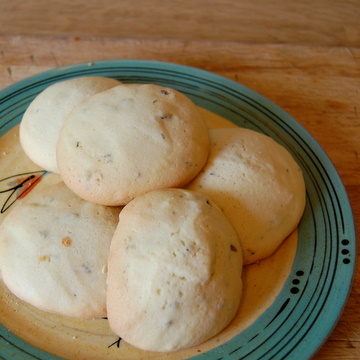
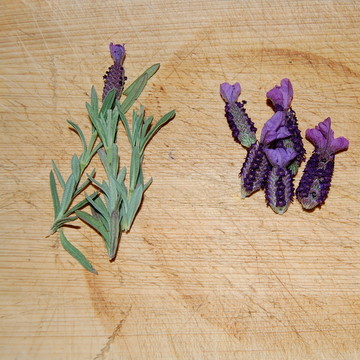
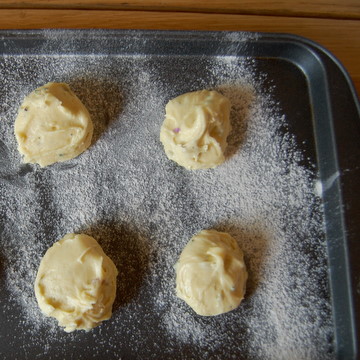
Jane: Edie brought home some Tudor biscuits she’d made at school which were unusually delicious – halfway between biscuit and cake, with a firm yet spongy bite and a slightly perfumed rosewater tang. They’re incredibly easy to make (obviously why they do them at school) because they don’t need rolling and cutting – you just drop spoonfuls of mixture on to a baking tray. To make them a little summery (as it is Chelsea Flower Show week) I added some French lavender leaves and flowers, which everyone said tasted like cinnamon when the biscuits were cooked. Very strange...
Lavender Tudor Biscuits 125g caster sugar 2 egg whites 1 egg yolk 1 tbsp lavender leaves, chopped 2 tbsp butter, melted 125g plain flour 60g semolina (or something to give bite – could be ground almonds, polenta, ground rice etc) 1½ tsp rose water 2 tsp lavender flowers
Heat the oven to 400ºF, 200ºC, and grease and flour two baking trays. Whip the egg whites and sugar together until fluffy. Stir in the egg yolk, lavender leaves, butter, flour, semolina and rose water. Finally add the lavender flowers and stir gently until mixed. Drop the mixture in large teaspoons on to the baking trays, leaving enough space for the biscuits to spread. Bake for 8-12 minutes, until light gold in colour.
King Henry VIII loves those lavender biscuits...
8th May 2009
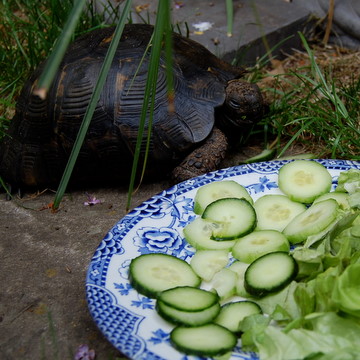
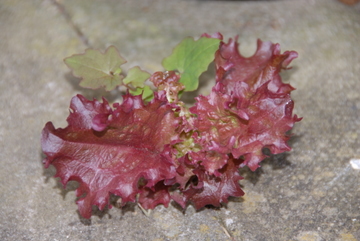
Jane: This is Joey, the tortoise. We’ve been feeding him for a few days. He is 70 years old, and the lady who owns him has been looking after him for 37 years. Amazing. I say he, but actually Joey is a she, only it took several decades and a trip to the vet before anyone found out.
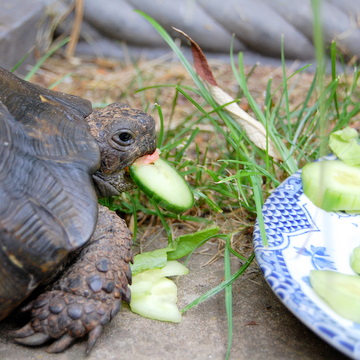
Joey likes warm weather, eating cucumber and the dark green, outer leaves of lettuces. In just a few days I got quite fond of her. She was always waiting for her plate of food (on the best blue china, preferably with the skin cut off the cucumber and lettuce torn up small to help her tiny teeth).
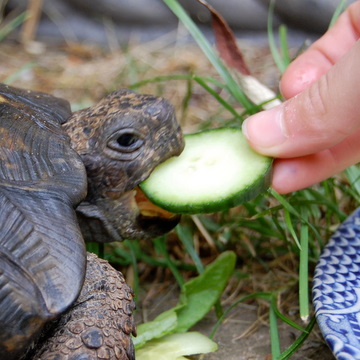
When she heard the children’s voices, she’d perk up, sticking her little head out of her shell, and she let them hand feed her bits of cucumber, showing her tiny red tongue. When her owner came back the weather had turned colder, so Joey was brought in and put beside the grandfather clock with an apricot coloured napkin over her. She seemed to like it there. When she heard my voice in the corridor, she poked her head out again as if to say thank you for looking after me. Or perhaps: not her again. Whichever it was, I was smitten.
16th Apr 2009
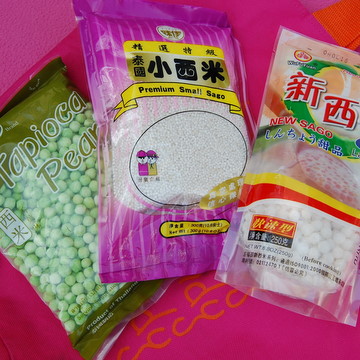
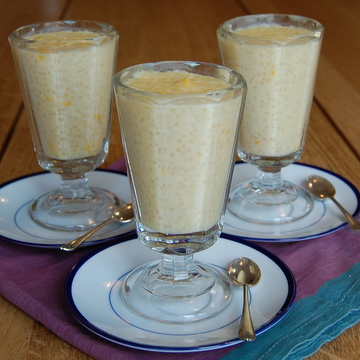
Jane: It all started with sago. A few weeks ago in a foreign hotel, I tasted my first sago pudding in two and a half decades. It was exquisite: a tiny bowlful of opalescent sago pearls and fresh mango slivers drifting in fragrant coconut milk. All those memories of stodgy, evap-milked, school frogspawn vanished instantly. This was a sago pudding I (and I hoped the kids) could learn to love. If only I could find out how to make it. Back home, I went on a search for sago. No luck in any of the big supermarkets or health food stores. Even in the foreign food shops I could only find weird hybrids. The version which looked most like sago and advertised itself as ‘premium small sago’ was actually made from potato starch (whereas sago comes from sago palm stems). ‘New Sago’, a Chinese, fast-cook variety, was made from tapioca (a starch derived from cassava roots, not sago palms). I bought them both anyway. Plus the large, green ‘Premium Quality Tapioca Pearls’, dyed with pandan leaf extract so they looked just like bullet-hard dried peas.
I found a chilled mango sago pudding recipe on the internet and started simmering the tiny potato starch pearls, adding coconut milk and mango, all the time hoping for manna. The recipe said it would make enough for four people but I managed to get eight bowlfuls, and cooled them as directed so they stood stiff with a thick, yellowish milk skin on top, the little potato pearls shining through, before proudly presenting them to the family as pud. ‘Sordid,’ ‘Solid starch’, ‘Godawful’ were a few of the kinder comments. Even I found it difficult to swallow more than two mouthfuls of this cold, starchy wodge. Into the bin it went.
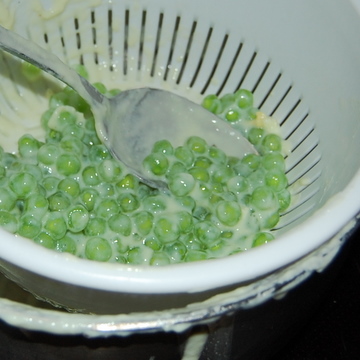
But I was still determined to produce a decent frogspawn pud. I’d used the potato pearls – now it was time for the green tapioca (which I remembered as tasting similar to sago) to grace our dinner table. It was Easter, we were staying with my parents, and opposition was stiff: every time I mooted the green tapioca pud option, there was an outcry from the junior members of the family.
Egged on by Mal, the kids hid the tapioca from me. It took a while but I eventually found it and shrieked in triumph, which brought them running – they chased me upstairs all the while trying to grab the packet. I locked myself in the bathroom, panting, clutching the tapioca to my chest. Where was I going to hide it? In the cistern? Too soggy (and unhygienic). In the airing cupboard? Too easy to find. So I chucked it out on to the flat roof outside, thinking they’ll never find it there. They didn’t. The monstrous green packet languished there until the evening, when the anti-tapioca rebellion had muted a little and I could bring it back in. But the window was too small for me to climb through, so Edie had to jump on to the roof to retrieve it (so kind, given her aversion to milky puddings), while I mused on what further ridiculousness my sago trip would take us. A few nights’ later, I felt strong enough to make the green tapioca. On the translated-from-Thai packet, it said: ‘Put Tapioca Pearl [sic] in boiling water and stirs [sic] lightly until look [sic] clear.’ I boiled it for about 20 minutes. Still rock solid. Thirty minutes: the edges were jellylike and chewy but the insides tough as old Doc Martens. Forty minutes: enough! We’d eaten our main course ages ago, and here was I still boiling the tapioca. Fine, it was a bit stodgy and solid in the middle, but I reckoned it would continue cooking while I made the custard.
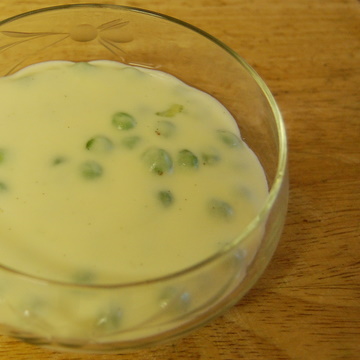
So I drained the water off the green gunge (green slime was drooling from the pearls, worth knowing if ever you want to make your own edible snot for Halloween). I added milk and sugar, brought the mixture to a boil, and stirred in the eggs. It thickened a bit until it looked like cream of spring veg soup, though the green tapioca itself was still tough and gloopy (how long does this stuff take to cook?). I dished it up anyway, straining it into the children’s bowls so they got pure, sloppy custard, while the grown-ups tried (and failed) to munch their way through the still chewy green pellets. Awful. Inedible. Grim.
I’m not sure about the moral of this story, apart from avoid tapioca, sago, and other foreign starches at all times if you want a happy family. But I know what I tasted in that foreign hotel those few weeks ago, and it was gorgeous. For that reason alone, the sago grail is still on my mind…
29th Mar 2009
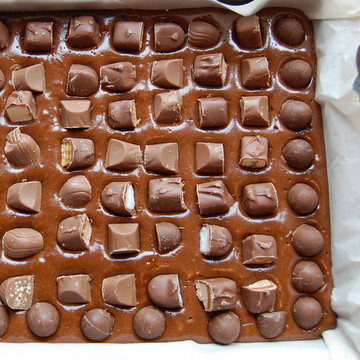
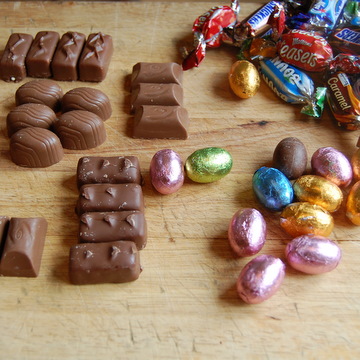
Jane: To make special customised Easter brownies, add some little eggs or chocolates (we used solid chocolate mini eggs and ’Celebrations’ chocs) to the recipe. It’s easy: make your normal brownie batch, then pour about a third of the mixture into the baking tin, place your eggs or chocolates in rows on top so each brownie will get a whole chocolate in the final cut portion, then pour over the rest of the mixture to cover completely. Cook as normal. Delicious...
And if you have wagonloads of chocolate around the house, use some up in this Triple Chocolate Brownie recipe, which has big chunks of milk and white chocolate in a rich dark chocolate base.
Triple Chocolate Brownies Ingredients 400g dark chocolate (70% cocoa solids) 550g unsalted butter 350g self-raising flour 1 tsp baking powder 650g golden caster sugar 8 large eggs, lightly beaten 2 tsp vanilla essence 200g milk chocolate, cut into large chunks 200g white chocolate, cut into large chunks Method 1 Preheat the oven to 170ºC/325ºF/Gas Mark 3. 2 Line a baking tin approximately 33 x 23 x 5 cm with baking parchment. 3 Put the chocolate and butter in a large bowl, place over a pan of simmering water and allow to melt. 4 Sieve the flour and baking powder into a bowl and set aside. 5 Remove the melted chocolate from the heat and stir in the sugar. 6 Add the beaten eggs and vanilla essence. 7 Fold in the flour, and milk and white chocolate chunks. 8 Pour the chocolate mixture into the prepared baking tin. 9 Place in the oven and bake until the top feels firm, but the inside is still gooey when you insert a skewer. You don’t want to overcook, so check after 25 minutes, though it may take up to 35 minutes depending on your oven. 10 Cool in the tin, then remove and cut into squares. 16th Mar 2009
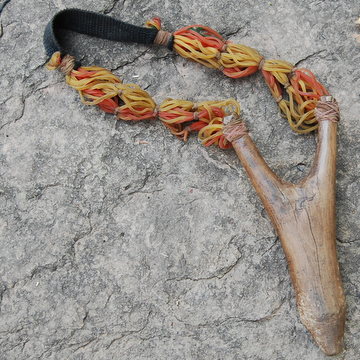
Jane: A couple of weeks ago, I was camping with some other journalists in the Cambodian jungle looking at ancient, beautiful but half-collapsing temples. One of the children who followed us around the temple sites (telling us stories of the history and natural world to make an extra dollar or two) showed me this highly effective catapult he’d built. It’s basically a strong bit of branching hardwood which has been whittled to a Y-shape. He cut a bit of camera strap to make the catapult cradle, then attached that to two chain of rubber bands to give it good stretch. Definitely worth trying at home.
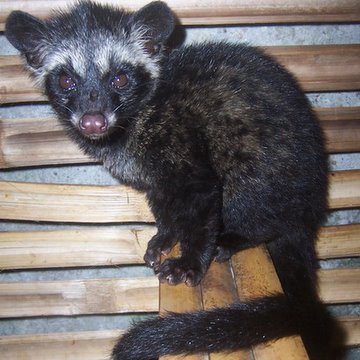
An Asian palm civet cat Warning: people of a sensitive, animal-loving disposition should probably stop reading this blog now.
That night in the jungle, while we were eating a delicious dinner prepared for us by a team of Cambodian cooks (I should point out that this was a cushy five-star jungle trip in ‘luxury’ tents), one of the team fired a stone from such a homemade catapult. It hit a cat, well actually an Asian palm civet cat, a gentle, black, shaggy, raccoon-like creature (see above) which eats mostly fruits and insects (including those delicious tarantulas of the blog dated 9th March, see below). The stone broke the cat’s leg so it fell from the tree, and was then killed, skinned, cooked and eaten by the Cambodian team for dinner. We observant journalists didn’t notice a thing. Next morning our guide told us about the catapulted cat and, of course, we were horrified (even though we had been eating steak and lamb for supper).
Is there a moral to this story? It certainly brought home what a strange and contradictory attitude we Westerners have to the food we eat. But, more importantly, how hungry many Cambodians are (20% of the population live in ‘extreme poverty’ according to the World Food Programme) for a bit of free meat. 9th Mar 2009
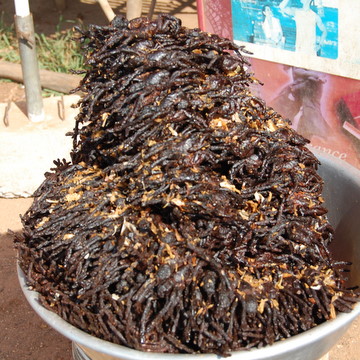
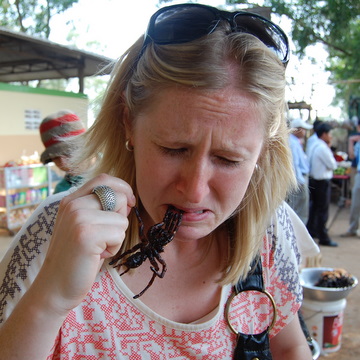
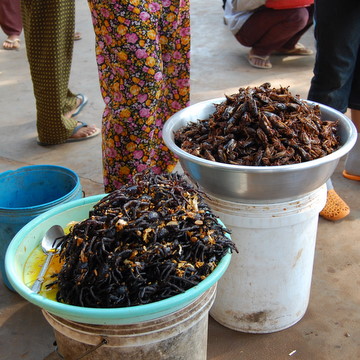
Jane: I’m always keen to try weird and wacky foods, thanks mostly to my dad, who encouraged us to get to grips with snails, liver and frog’s legs by the age of about eight. But on a recent trip to Cambodia, the concept of wacky gastronomy hit a new high (or low, depending on the strength of your stomach). To wit, tarantulas. You can see them in the picture above, piled up in a country market stall near the jungle, several hours’ drive from the capital city of Phnom Penh. Would you eat these? Thought not. But two of us with more hair than sense decided we must, just must, have a taste to show we’ve walked on the wild and jungly side and lived to tell the tale. Well, let me tell you, spiders taste foul. We took one off the top of the big pile. It was black and shiny, fried in oil. (One man told us they pull out the poison sac and fangs before you eat them which was some comfort, and apparently tarantulas are not really poisonous anyway, they just look it.) We both chewed a leg (not the same one). It was tough and fibrous. With an oily aftertaste. I spat it out and gave up.
Lizzie munched manfully on.
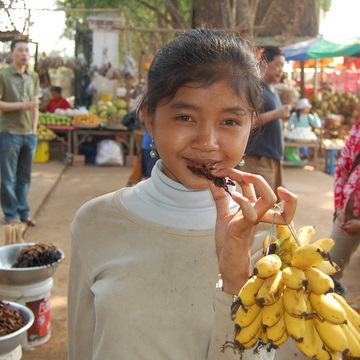
We asked the children if spiders really were a delicacy and they nodded enthusiastically. But when we asked if they wanted one they all said no, except for one brave girl who didn’t really look as if she was enjoying it either, especially when she got to the soft yellow bits in the middle. (A few days later we were told the spiders have to be fresh – ie just fried, and eaten with rice. These ones were probably days old. No wonder they tasted a bit off.)
In Cambodia, our guide explained, they eat everything except the table and he wasn’t joking. In the next basket were grasshoppers, and we saw big red ants – the stir-fried eggs are considered a special treat. This ‘if it moves, eat it’ philosophy is partly a legacy from the days of the Khmer Rouge, when people were starving and would eat anything from tree bark to flying insects to stay alive. Nowadays, people aged 40 and over who lived through the 1975-79 Pol Pot atrocities often have terrible stomach and digestive problems, and one of the things they take for it is spider whisky in which tarantulas (and sometimes ants, for the formic acid) are steeped to make a strong medicinal tincture. Apparently spider whisky is good for bad backs too.
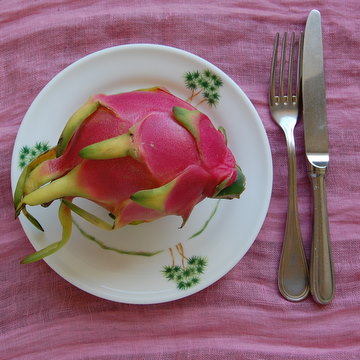
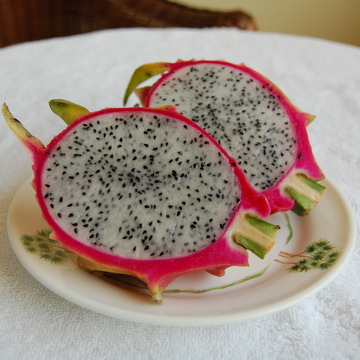
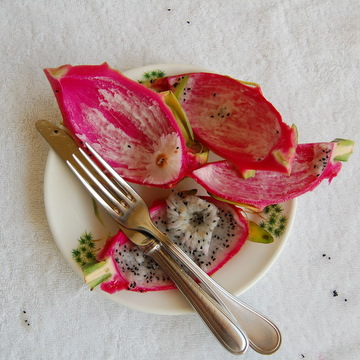
In the end I gave up on insects and turned to the delicious fruit instead. This beauteous pink thing is a dragon fruit.
Its insides are white with tiny black seeds, like a well-washed lino floor. Delicious.
I enjoyed that.
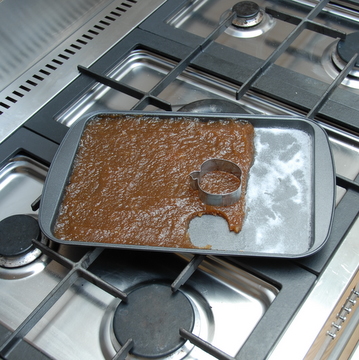
9th Feb 2009
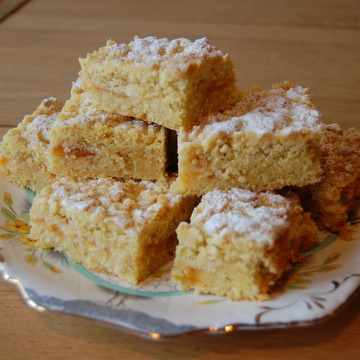
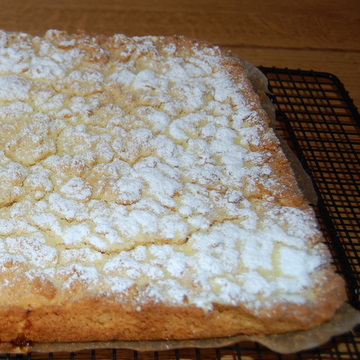
Jane: This
is the time of year for lovely comfort puds like crumbles and roly polys and
here’s a fantastically stodgy teatime equivalent beloved of all members of our
family. It’s a heavyweight buttery shortbread with a sweet and fruity layer
that makes you think spring might be on the distant horizon. It’s also good to
make as a traybake for school dos as both children and adults like it a lot,
and you can make 24 or so slices in one batch. 500g unsalted butter, at room temperature 4 large egg yolks 200g caster sugar 450g self-raising flour 50g polenta Pinch of salt 400-500g apricot compote (I use Bonne Maman’s big pots – the rhubarb is delicious too – but you can make your own with whatever fruit is to hand) Icing sugar for dusting
In a large bowl, beat the butter until pale and soft. Add the egg yolks and sugar, and beat well until light and creamy. Add the flour, polenta and salt and stir in with a metal spoon or on the lowest speed of your electric mixer. The mixture will be very thick – almost too thick to stir. Divide into two batches, wrap in cling-film and chill in the fridge for half an hour or so.
Meanwhile, line a 30 by 23 by 4cm baking tray with baking parchment.
Take one batch of dough from the fridge, and grate the mixture straight into the tin, using the largest holes on your grater – it will come out like fat worms. Press lightly down into the corners and to make sure the layer is level. Spoon over the apricot compote evenly. Then take the other batch of dough from the fridge, and grate it evenly as before over the apricot layer. This time don’t pat the dough down – it looks better if the top surface is a little crumbly and uneven. Bake at 175 degrees C/Gas Mark 4 for about 40 minutes or until the shortbread has taken on a golden colour. As soon as it comes out of the oven, dust heavily with icing sugar. Cool on a rack, then cut into squares or slices. 30th Jan 2009
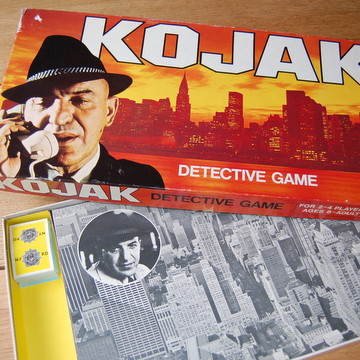
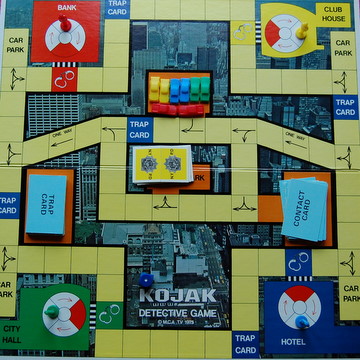
Jane: One of my favourite games this year was the Kojak Detective Game – yes, you’ve guessed it, an Xmas eBay purchase. I must have missed it first time round but the box and board now have a cutesy kitsch appeal – incorruptible cop Telly Savalas with his gleaming bald head, lollypop and mordant wit. Actually, forget the wit – this game is simple, all you have to do is catch the baddie with your two squad cars, though the route to do so is tortuous, with a series of complicated technical manoeuvres that are (you’ll be glad to hear) currently beyond my descriptive powers.
The good news is you get to
do some typical cop driving – going forwards and backwards (though hopefully
not up one-way streets) to get the right cards to make sure the baddie is in
the right place at the right time to be arrested. I enjoyed it a lot and if
you’re tempted, I’ve just looked on eBay and they have a couple for sale right
now…
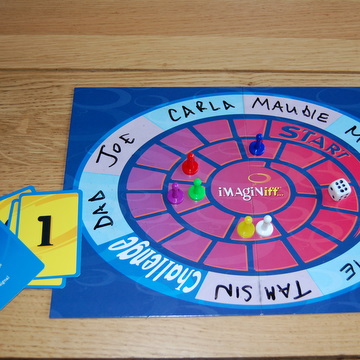
The
children liked Kojak but in all honesty preferred Imaginiff, which is a funny, cheeky
game for family get-togethers. On the board, you write the names of family,
friends, the famous – people you all know about and can have a good guess at
how they would behave in any situation. Everyone gets given a set of six cards,
numbered from 1-6. One person then rolls the die, and moves the grey counter
around the outer rim of the board to land on a person’s name – this person then
becomes the subject of the next question round. The player picks up a question
card and reads, putting the subject’s name into the question. For example: ‘Imaginiff
MAUDIE (name of subject) had to live in another era. Which would it be? Everyone chooses an answer by placing one of their number cards face down, then turning them over at the same time. Those with the most popular answer (eg with two or more people voting for ‘6 The future’) move one space forward round the inner board. Everyone else stays where they are. You continue like this, taking it in turns to ask questions about different subjects, and moving your counters when you score the most popular response. The winner is the person who gets to the centre of the board first. The cards pose witty questions and sometimes dangerously astute answers. It's great fun, not least because you get to be a little cheeky about people close to you and the way they behave… 17th Dec 2008
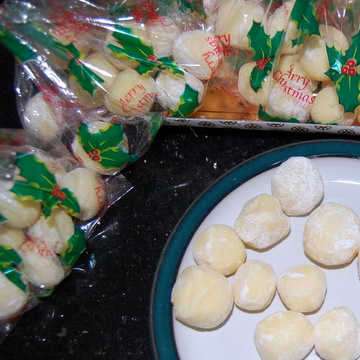
Jane: Easy, delicious white chocolate truffles made by my friend Sue – pack them into Christmas bags or decorated boxes and they make a fantastic home-made present for teachers, relatives, as a house party gift etc.
25g unsalted butter
Small tub double cream Few drops vanilla extract 225g good-quality white chocolate, finely chopped 50g desiccated coconut or icing sugar for rolling In a pan, melt the butter and double cream together gently, then add the vanilla. Add the white chocolate pieces and beat to a smooth paste. Leave the mixture to cool in the fridge for two to three hours, stirring occasionally to ensure it is smooth. Once it’s set enough, roll into little balls and coat with desiccated coconut or icing sugar. Place in a bag or box, and store in the fridge until needed. Will keep for several days. 15th Dec 2008
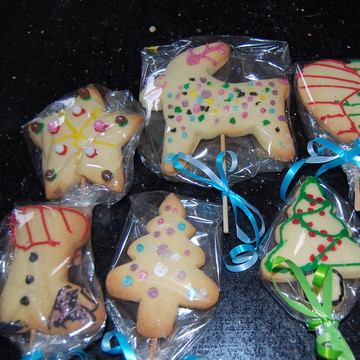
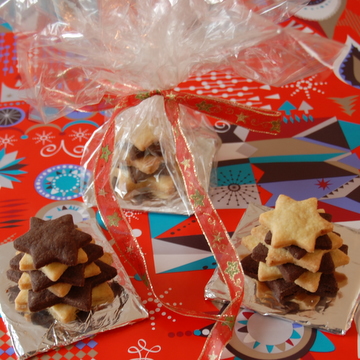
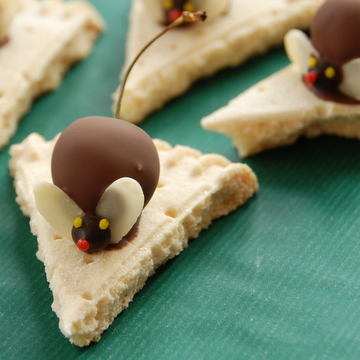
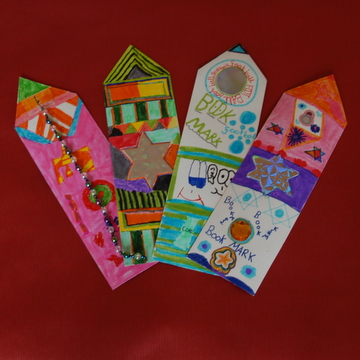
Jane: This is the week when we all run around trying to find fresh inspiration for Christmas gifts to give the teachers before term breaks up on Friday. Last weekend I read a newspaper article talking to teachers about the thorny subject of getting 30 naff Christmas gifts from their class - they cheerfully said they appreciate home-made stuff a lot more than mugs or plaques saying toe-curling things like ‘world’s best teacher’. Which is great, because home-made it’s going to be. This year, as well as the bath bombs, we’re mostly going to be giving Christmas biscuit lollypops. They look fantastic, taste delicious, are easy to make in bulk, and the children can unleash their creative side while decorating them, which makes them very personal.
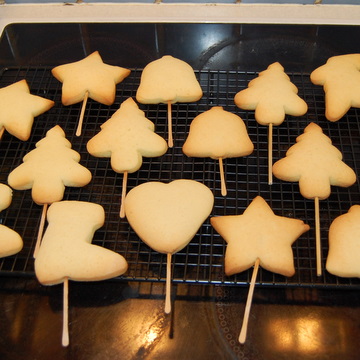
You need good, buttery-tasting cookies which also hold their shape while cooking: we used a recipe from Nigella’s Domestic Goddess (see below) but any old favourite you know that creates solid cookies will do. Cut out the biscuits a little thicker than normal – about three-quarters to one centimetre thick – using Christmas cutter shapes like trees, stars, Santa’s boots, reindeers, bells etc. Before putting the biscuits in the oven, push a small but solid wooden stick (cut-off kebab skewers work well – cocktail sticks are a bit too flimsy and traditional lollipop sticks too big) through the middle of the biscuit, then cook for a couple of minutes longer than usual.
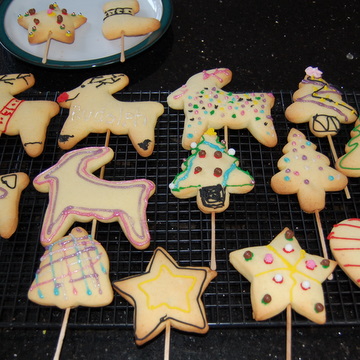
When they’re cool, the children can get to work with the decorating – we used bought, brightly coloured icing pens because they’re easy, but you can make your own icing if you prefer. Then leave the biscuits to dry. They look great wrapped in cellophane with a ribbon and a little handwritten tag, proving it’s not just the thought but also the effort that counts.
Good-shaped Cookie Recipe
This makes 30 or so biscuits 175g unsalted butter 200g caster sugar 2 large eggs 1 tsp vanilla extract 400g plain flour 1 tsp baking powder 1 tsp salt Cream the butter and sugar until pale and fluffy, beat in eggs and vanilla extract. Mix the flour, baking powder and salt in another bowl, then add the dry ingredients to the butter mixture, mixing well to make a dough. Divide dough into two balls, wrap each in cling-film and place in the fridge for at least an hour (you can freeze one half for use later). Roll out on a floured board to about ¾ to 1 centimetre thick, and cut out in seasonal shapes. Place a wooden stick carefully into each biscuit, then lay on a baking sheet covered with lightly floured greaseproof paper, and cook at 180ºC for about 10 to 14 minutes. When cool, decorate as above. 6th Dec 2008
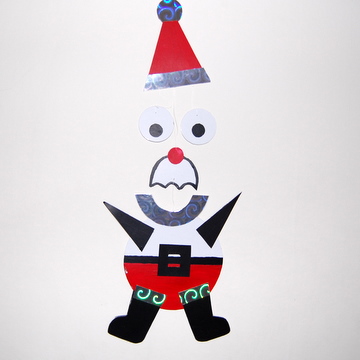
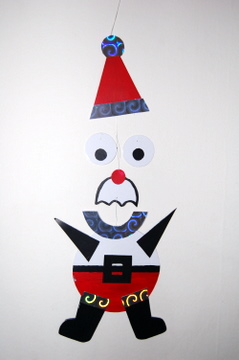
Jane: I
was digging around my parents’ Christmas decoration box recently and came
across an old, homemade Hanging Santa. He was always a real family favourite, strung
up from a hook in the middle of the hall corridor so he kicked everyone in the
eye every time they passed (funny how no one thought of putting him anywhere
more convenient). Twenty years on, he was looking a little ragged around the
edges, so I decided to make him afresh for Xmas 2008. And here he is, looking
very sparkly and chipper, raring to go for some chimney action come the 25th.
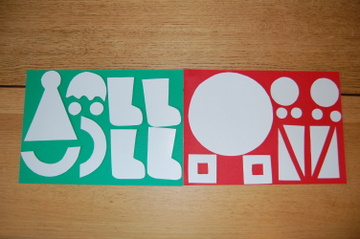
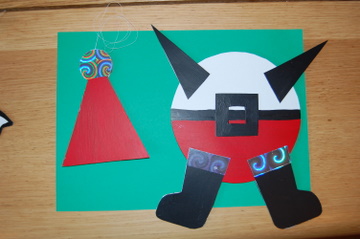
Hanging Santa is easy to make, once you’ve cut out the shapes, but he does take a bit of faffing-around time to let paint dry etc. All you need (that famous phrase) is a piece of white cardboard, some zany metallic card for decoration (or use cotton wool instead), black and red paints, glue, a needle and white thread. First draw
and cut out the shapes from the white cardboard: a big circular body; four
boots (you stick two sides together); four triangular arms (ditto); one
moustache; two large circular eyes; four small pupils; two belt buckles; one
hat with a pompom shape on top; two small circles for the nose; and two half
moon collars.
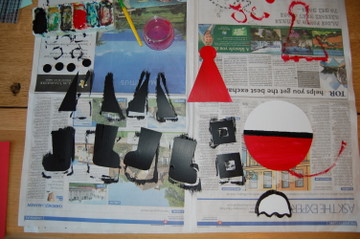
Then get
out the paints: paint the boots, buckles, four pupils and arms black. Paint the
hat red on both sides. Paint the body half red, and paint a black belt line, on
both sides. Paint a black edge around the moustache, on both sides.
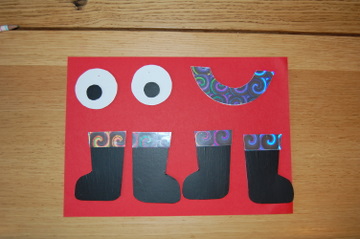
Once all this has dried, take your zany metallic card and cut out four tops for the boots, stick on with glue. Cut out two metallic circles to fit the collars. Stick a black pupil on to each side of the two eyes. Stick the two red noses on top of the moustache, one each side. Cut out
two metallic circular pompoms for the hat. Thread a double piece of thread
through the original pompom, tie fast – this will be the thread your Santa
hangs from. Then stick the zany metallic pompoms over each side to cover.
Now you
can build the Santa. Stick a boot on each side of the body, fitting them
together neatly as shown. Repeat on the other side. Do the same with the arms.
Stick a buckle on each side of the body over the belt line. Then stick
the two plain collars together over the body. Using a needle and thread, make a
hole in the centre of the collar (where it overlaps the body) and tie fast one
end of the thread. With the other end of the thread, make a hole in the bottom
of the moustache, and tie fast at the required length. Stick the two metallic
collars on top of the plain collar, one on each side of the body, to cover the
thread hole.
In the
centre of the red nose, make another hole with the needle and thread and tie
fast. Attach the other end of the thread to the middle brim of the hat (about
1cm in). Tie fast at required length. Now hang the two eyes from the hat brim
with thread, and tie fast. Stick over two lengths of metallic card on the hat
brim, to cover the holes. And there
you have him – a Hanging Santa. Okay, mine looks like a gormless Homer Simpson
(it’s the moustache) though he’s still rather cute, breezing around happily
on the wall. 28th Nov 2008
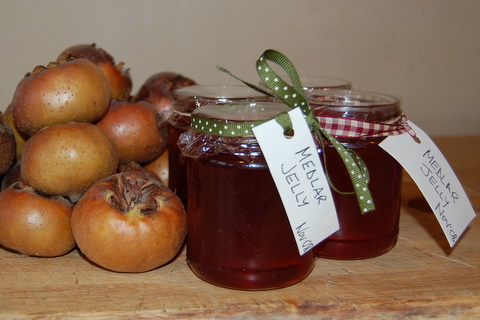
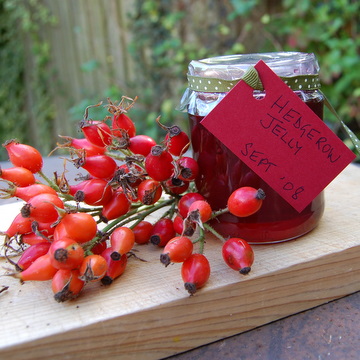
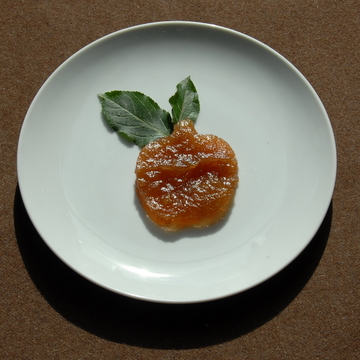
Jane: My neighbour has a rarity in his front garden – an exquisitely shaped medlar tree which produces prolific late-ripening winter fruit. You just shake its leaf-bare branches and a profusion of hard, yellowy-brown, inedible fruits hits you on the head. Inedible at least until they are made into jelly, cheese or ‘bletted’ – stored until they go brown and soft, internally fermenting (they look as if they are rotting) until the flesh turns to a fragrant, slightly cloying-tasting pulp. Given this, you can understand why medlars are not popular today, but they were considered a delicacy in Victorian times, the bletted fruit scooped out and eaten raw with cream and sugar as a winter pudding. The fragrant tartness of medlar jelly, however, is extremely good eaten with poultry or game. Jane Grigson does a very straightforward recipe: cut up your medlars, cover with water and simmer until the fruit turns to a pulp. Strain for a few hours over a jelly bag (don’t squeeze if you want a clear jelly), add 500g sugar for each pint (600ml) of medlar juice, boil, then pot once setting point is reached. I used a jam thermometer and potted at the setting point of 105 degrees C – a big mistake, as once cool, the medlar jelly was still liquid. So I boiled it again to slightly above setting point: again the jelly was too runny. The third time, I added the juice of a lemon, thinking it might improve the set, and boiled, this time doing the saucer test (putting a teaspoonful of boiling jelly on a cold saucer – if the jelly is ready, the surface wrinkles when you push a finger over it) which I normally can’t be bothered with. Finally, the jelly wrinkled in the saucer at over 106 degrees C – it was done.
Given three boilings, you could play squash with a ball of this medlar jelly but, even though the texture is rubbery, the taste is still flavoursome. I had some last night with roast chicken. 24th Nov 2008
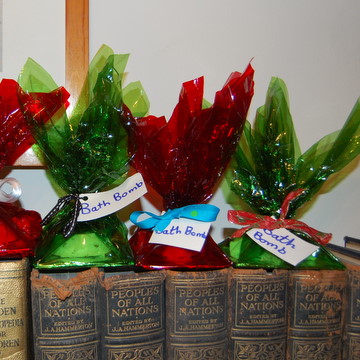
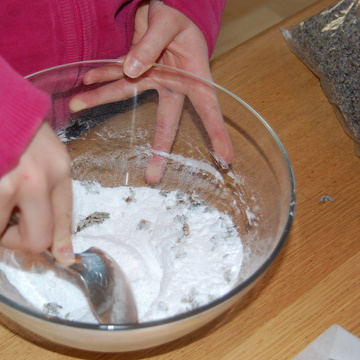
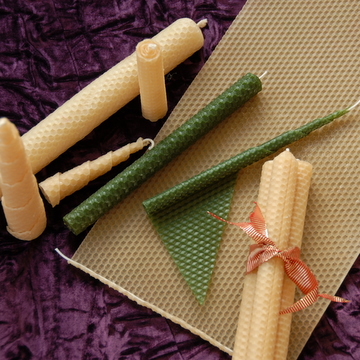
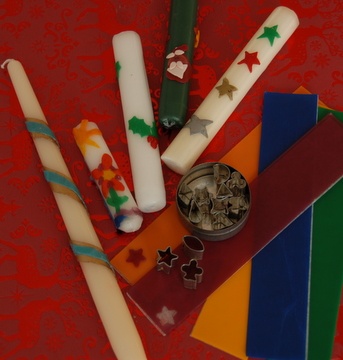
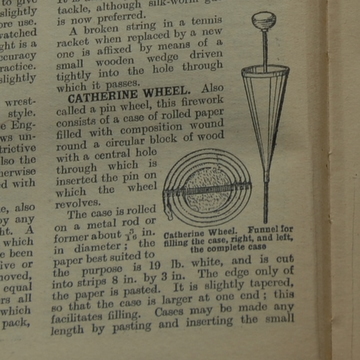
Jane: I’ve just finished a couple of months’ whopping workload and lifted my head to see…snow! A few flakes anyway, fluttering down yesterday, and more on the way according to the weather people. So we decided to spend the freezing weekend inside, lighting a big log fire, doing Stir-up Sunday pud-making and thinking of new present ideas to make for Christmas. One of them was Bath Bombs, inspired by the belief that at Christmastime you can’t go wrong with a bit of pampering and a lot of fizz.
The bombs are quick and easy to make – though take 12 hours to dry – and look very seasonal made in the shapes of Christmas trees and hearts, then wrapped in cellophane and ribbons. They’re exciting to use too: when you drop one in your bath it fizzes and twirls like a Catherine wheel, releasing its skin-soothing oils and fragrance for a good soak. All you need are a couple of packets of citric acid (from chemists), bicarbonate of soda and vegetable oil (we used sunflower but almond and olive are lovely on the skin). We added some dried lavender flowers (or you can use any fragrant essential oil you like) and a bit of colouring too. In a dry glass bowl, measure out 1 part citric acid to 2 parts bicarbonate of soda. Stir gently but thoroughly with a metal spoon – the mix is quite potent and can make you sneeze so stand back while stirring.
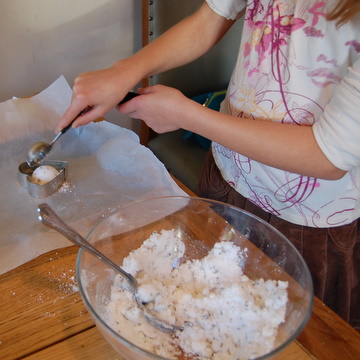
We added in the lavender flowers next, stripped from their stalks, or stir in a few drops of essential oil if using. Then add in half teaspoonfuls of oil one at a time, stirring really well, until you get a clumpy but not wet mixture. You can also add a few drops of colouring here – we used green food colouring but be careful not to put in too much as the mixture can start fizzing, which you want to avoid at all costs.
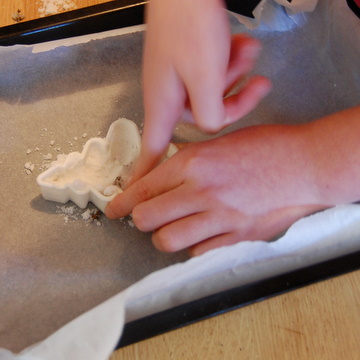
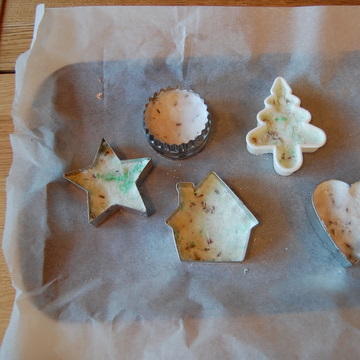
Then spoon the bomb mixture into seasonal cookie cutter shapes, placed on a baking tray covered with greaseproof paper. Press the mixture down hard, then leave overnight to dry.
Next day, push the bombs carefully out of the moulds. Lay them on a small piece of cardboard covered with silver foil or wrapping paper, then fold over a cellophane sheet and tie with ribbon and a label.
30th Oct 2008
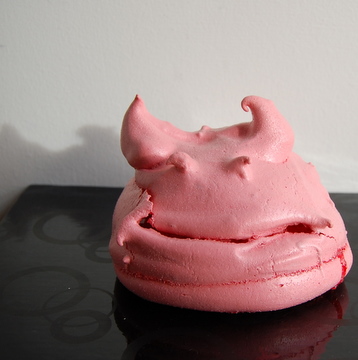
Jane: The ghostly meringue banshees went down so well with trick or treaters last Halloween that I thought I'd make a similar version on a devilish theme this year. The devil meringue had to be red, with diabolical horns, a fiendish mouth and an evil expression (sadly, I knew cloven hoofs and a devil's fork were way too ambitious for the medium of meringue). In the end, even 'red' turned into a bit of challenge. I made the meringue as normal (for instructions see meringue banshees) and at the last minute added my red food colouring. The mixture turned a light pink. I added some more colouring, it turned a slightly darker pink. I could see that if I added the 2 or 3 teaspoonfuls needed to make the mixture a deep and bloody red, the meringue would be so sloppy it wouldn't hold the devil shape. So the devil became pink (hope he didn't mind).
On a sheet of greaseproof paper, I whirled spoonfuls of pink meringue to try and create a devil shape. The floppy mixture wouldn't quite hold and kept squidging out sideways, getting fatter and fatter as I added more for height. Still, fat devils can be fiendish too. I shaped two crescent horns using a straw, whirled some eyes, and drew a long downturned mouth. Then I shoved the little monster in the oven to crisp up. I had a peek about an hour in and the devil was frothing red blood (the colouring) from the gash of his mouth – marvellously gruesome. I left overnight hoping the blood would solidify creating a truly scary sight. In the end, there was just a dribble of blood, but the devil looked rather splendid as though he'd been on a three-day eating and drinking orgy, his horns slightly bashed and with a rueful but still devilish expression on his face. 22nd Oct 2008
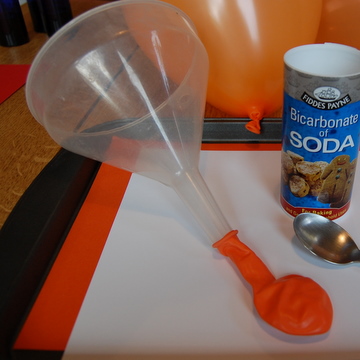
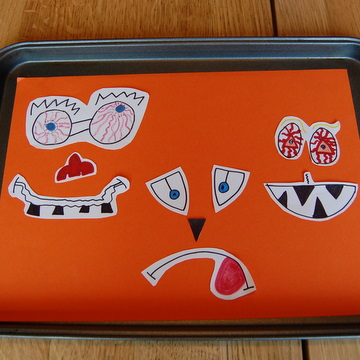
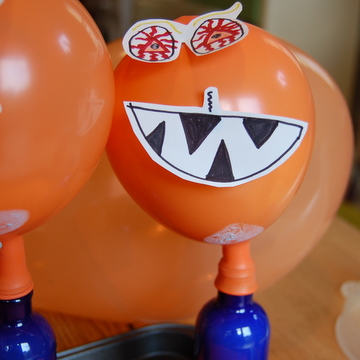
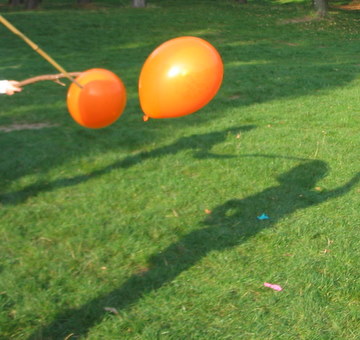
Jane: As a gruesome welcome to trick or treaters this year, we wanted to try out something new and a bit different – some gorgeously gassy grotesques. The idea of three expanding Halloween balloon monsters lined up in a row, wobbling and burping horribly before our eyes, seemed very enticing. So Edie drew some monstrous mouths, eyes and noses – enough for three faces (see below) – and cut them out. We found three small bottles, some orange balloons, and got out the bicarbonate of soda and vinegar ready for the old explosion trick
First we filled the balloons with a very big teaspoonful of bicarb using a funnel (flow it in gently, otherwise it can get stuck in the neck). Then we filled the three bottles one-third full with vinegar.
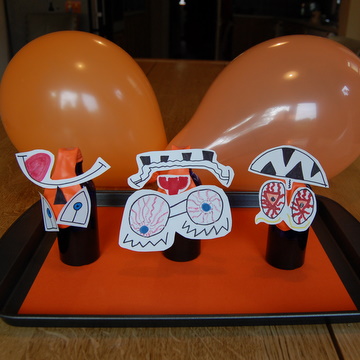
We attached the neck of the balloons over the bottles, making sure to pull the plastic down as far as we could and being careful to flop the balloon over to one side so no bicarb falls in to the bottle.
Then we stuck the eyes, mouths and noses upside down on the balloons, with a small separate piece of blu-tack on each bit.
Then came the exciting bit – we turned up the balloons so the bicarb fell into the vinegar, and the balloons began to expand with the carbon dioxide produced. The faces stretched and grimaced, and started flopping madly on their wobbly necks. The bottles were made of plastic – not quite heavy enough to support the weight of the balloons – so they all fell over and crashed. It was messy, very messy! But also very good (and a little bit scientific) fun.
30th Sep 2008
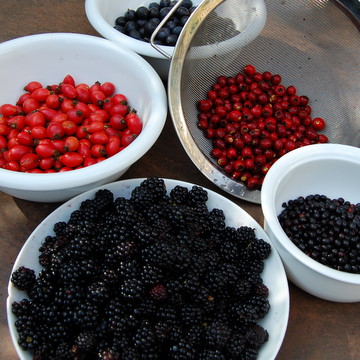
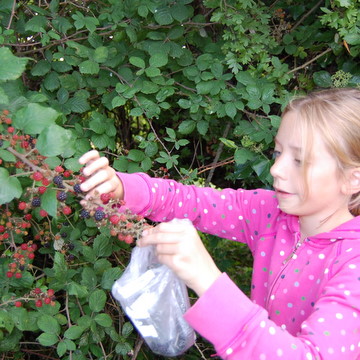
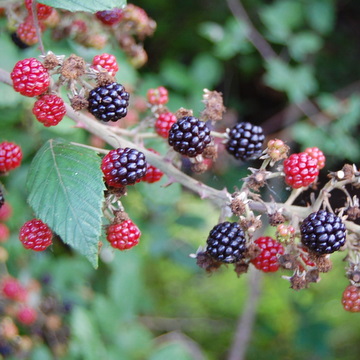
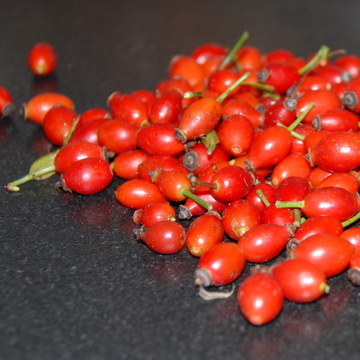
Jane: Last weekend the children were camping, so Mal and I went hedgerow picking with a step ladder. Ooh, it made life much easier. We could reach all the sloes and lovely juicy blackberries that everyone else had left behind. I’ve just bought a fantastic book, Hedgerow Medicine, which shows you how to make teas, tinctures and balms from the plants that are all around us. But I started off with hedgerow jelly:
Hedgerow Jelly This has a lovely delicate flavour and despite the sugar can even be called healthy (hawthorn especially is good for lowering blood pressure and cholesterol). I used a mix of sweet (blackberry), bitter (sloes) and sour (rosehips, hawthorns) flavours but you can use any hedgerow fruits including rowan berries. Always use the same amount of cooking apples as other fruit: they provide the pectin to set the jelly. 1kg cooking apples 300g blackberries 250g sloes 100g elderberries 150g hawthorn berries (haws) 200g rosehips About 2 litres water, to cover 2kg granulated sugar Wash the apples and cut into big chunks, leaving the skin, pips and cores on. Strip the fruit from the stalks (no need to top and tail) and rinse. Put all the fruit into a big preserving pan, and cover with water. Bring to the boil, then simmer until the fruit is soft, about 45 minutes to an hour. Put the mixture into a muslin-covered sieve or three-legged jelly bag and leave to drip into a pan. This might take an hour or more but don’t hurry it – if you squeeze the bag the jelly will not be clear. Measure the juice, then return to the pan. (Make sure the pan is only half full: if you have more juice than that, do a second boiling.) Add in 500g sugar for every 500ml juice.
Heat the pan gently, stirring until all the sugar is dissolved. Then bring to the boil, skimming off any white scum that forms on the top. Turn the heat down, and leave to simmer uncovered until setting point (105ºC, 221ºF) is reached, usually about 10 to 15 minutes. I use a thermometer or you can try the wrinkle test: place a teaspoon of jelly on a cold saucer (keep in the fridge), leave to cool for a minute, then drag your finger over – if the top wrinkles, it’s ready. (Always take the pan off the stove while doing this to avoid overcooking, which loses the set.)
Pot into warmed sterilised jars and immediately place a wax circle on top (wax side down), and seal. Store in a cool place. Tie a pretty ribbon round and label. 19th Sep 2008
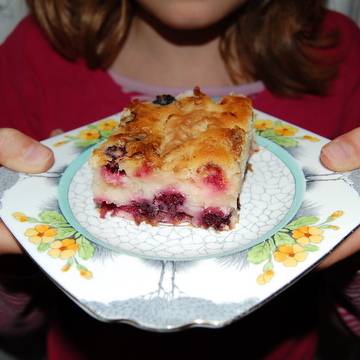
This is delicious hot, but even better cold a day or two later.
4 cooking apples (about 800g) Juice of a lemon 285ml whipping cream 175g butter 225g caster sugar 3 eggs 300g plain flour 300g blackberries 1 tbsp dark brown sugar for sprinkling Heat the oven to 200 degrees C, Gas Mark 6. Grease a 30cm by 20cm roasting tin with a little butter, then dust lightly with flour. Peel and core the apples, then slice them into rings. Toss them in the lemon juice to stop them browning. Put to one side. Put the cream and butter in a pan and bring to the boil, then set aside to cool slightly. Meanwhile, whisk the caster sugar with the eggs until they turn pale. Whip the cream mixture into the egg mixture, then fold in the flour until completely smooth. Pour a thin layer of the mixture into the tin. Then lay the apple rings over, and sprinkle the blackberries on top. Pour the rest of the mixture over the fruit – it will only just cover it. Sprinkle the dark brown sugar evenly over the top. Bake for 45 mins to an hour (depending on your oven) until golden. Leave to cool in the tin then cut into squares. Also try our Blackberry Polenta Cake.
11th Sep 2008
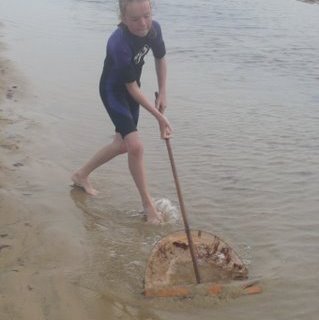
Jane: Any one for shrimping? Okay, we might at the fag end of the season but it’s still worth a go. This summer, my neighbour Gill rediscovered her lovely wooden shrimping net from childhood: it’s 40 years old and as you can see, in pretty good nick. As a child, she used to go shrimping on Happisburgh beach in north Norfolk with this very same net, and this year took her children to Waxham Sands near Great Yarmouth to see what they could catch.
The net is a good solid one with a flat edge at the bottom which you push along the seabed in a few inches of water when the tide has gone out, as shown above. The shrimp, tiny flatfish, starfish, crabs and loads of other kinds of marine life are scooped into the net.
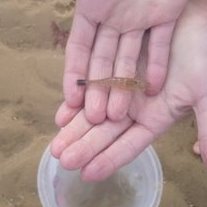
You can see Jasmin holding a brown shrimp, a wiggly translucent thing…
Collect the shrimp in buckets as shown here (Millie and Edie are practising their mussel technique in the garden)…
The children were horrified but Gill and her mum cooked the shrimps on the campfire, then ate them with buttered brown bread and a sprinkle of white pepper. (To cook, you put the shrimp in heavily salted boiling water for three to five minutes until they turn pinkish. Take the heads off before you eat them, but crunch the other crusty bits.) Or like Millie and Jasmin, you might feel happier chucking them back into the sea… 20th Aug 2008
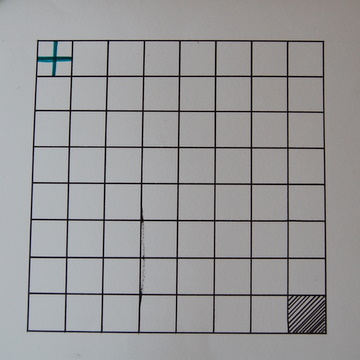
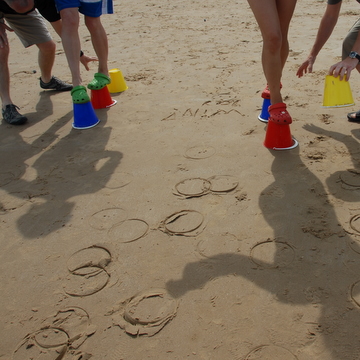
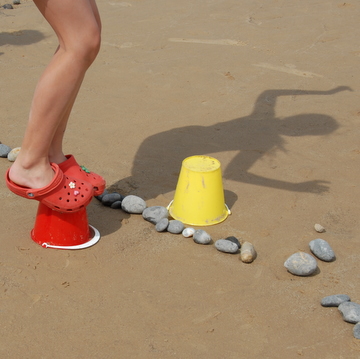
Jane: After being rained off the beach for the nth time this drippingly awful week, we decided to play Gridlock, a paper and pencil game for two I found in an old 1960s' activities book. It's actually quite tricky to play - the idea is to 'draw' your way from 'home' (the cross in the top left hand corner of the grid) to your destination square (the bottom right hand corner of the grid) without being forced out of the grid by your opponent.
First you take a sheet of squared paper, or draw a square (as we did here) with at least eight smaller squares on each side. Fill in the top left hand corner with a cross, and black out your destination square - the bottom right hand corner. You then have to draw your journey square by square, each player taking it in turns to fill in one square at a time.
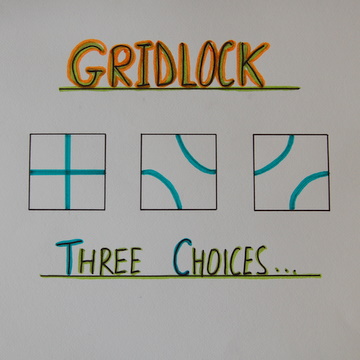
There are three possible ways to fill the squares - see the three choices above. You can choose any one you want (except on the very first go, when the first player cannot use the cross) so long as you attach it to an existing line. Keep filling in squares turn by turn and you will see a 'snail trail' building up through the middle of the squares you have coloured in on the grid. All the while, you are trying to push your opponent into a position where they have no option but to 'draw' themselves out of the grid - leaving you to reach the final destination alone.
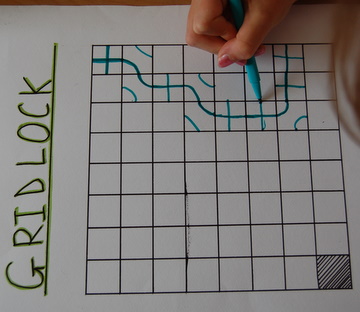
The picture above shows one of our first attempts - you can see the central 'snail trail' leading out of the top of the square, thus losing the game for the player who filled it in. Instead, aim to loop the trail back around itself (see the first image above) to manoeuvre yourself to the 'destination' square, timing it so you, and not your opponent, draw in the final square and thus win the game. For some other good wet weather games, see the 'games' section of the Den. 6th Aug 2008
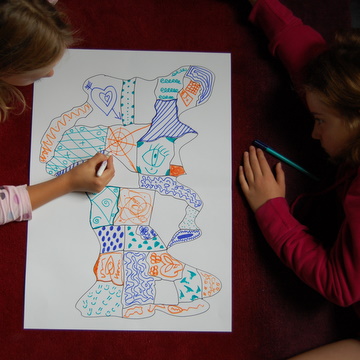
Jane: It's been raining on and off for days here, and after two trips to the cinema to see Mamma Mia! and Kung Fu Panda (both very cheering), we wanted to play some indoor games instead. As it's the summers hols and we didn't want to stretch our brains too much, we decided to play a game which involves a bit of thinking and a lot of colouring in, called Continental Drift. It's good for all ages – little ones really enjoy the colouring in – and for two or more players.
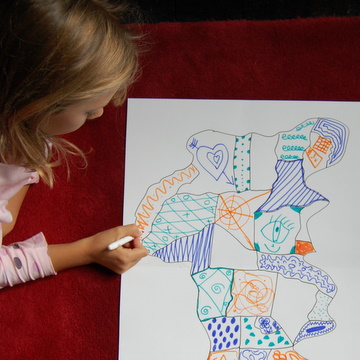
All you need is a big sheet of paper, on which someone draws a map of an imaginary continent – any shape and however wiggly you like. Inside this continent, draw 20 or more countries (our inspiration was Africa) with boundaries meeting each other. Then give everyone a different coloured felt-tip pen and you’re ready to start.
The aim of the game is to be the last person to colour in the last possible country. The only rule is that no two countries which touch along a borderline can be coloured the same colour. To start off, a player (Orange) colours in one country (hint: try to pick one which borders as few other countries as possible – it gives you more options later on). The next player (Green) then colours in a country, and so on, with everyone taking turns. Any player who can’t go drops out, and the winner is the person who colours in a country last. It’s quite a creative, arty game if you draw different and unusual patterns in each country instead of just colouring in – our continent had a big scary eye in the middle… 17th Jul 2008
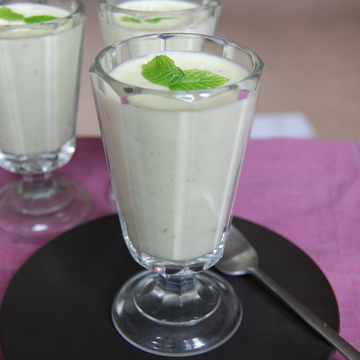
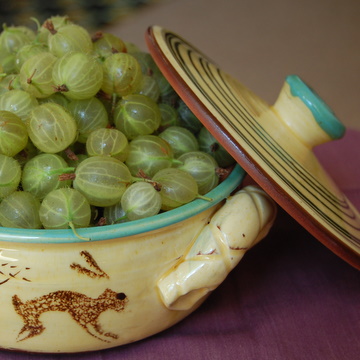
Jane: Our exceedingly kind neighbour Julia brought round a big bag of home-grown gooseberries this week, freshly picked from her allotment. I love goosegogs though they are funny-looking things, all veiny and hairy and hard as bullets, full of juice and tart flavour once you cook them. Some were very large and it suddenly brought back memories of reading years ago about some wacky ‘gooseberry clubs’ around Manchester and Yorkshire where growers had annual competitions to cultivate the largest gooseberry ever. They stripped their bushes of all fruit but one, which then grew to a whopping two ounces or more. Just eight of those and you can make a pretty decent gooseberry tart. But instead, we decided to make our favourite green pud - gooseberry fool.
Many recipes use whipped double cream, but I prefer the poor man’s fool where you mix custard and cream together so it’s not quite as rich. You can make your own custard, though I use Bird’s which is a lot quicker and is another childhood food favourite that I still absolutely adore. (Especially when it’s as thick and gungy as wallpaper paste, but that’s another story.) I also add a splash of elderflower cordial, to give the gooseberries a nice depth of flavour. Surprisingly, the children lapped up this pud, and wanted more. And meanwhile, I'm thinking what a good idea a meaty gooseberry and elderflower jam would be. I'll keep you posted... PS: Guess what: many of the old Yorkshire goosegog conventions are still going strong. The Egton Bridge Old Gooseberry Society, which has been running for over 200 years, is apparently having its annual competition to find the heaviest gooseberry on the 5th August. Unmissable. See you there! 12th Jul 2008
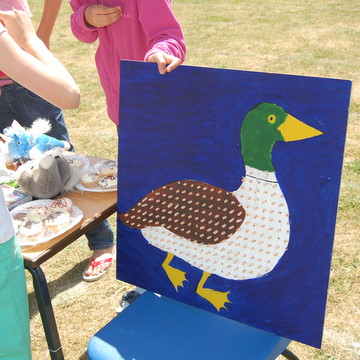
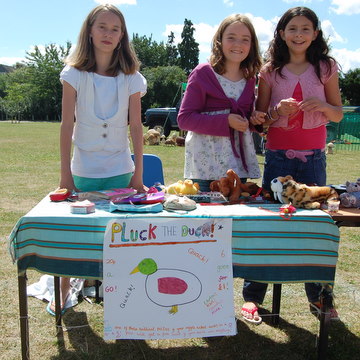
Jane: Last weekend it was the school summer fair and the girls ran a Pluck the Duck stall – a kind of tombola where you win prizes by picking raffle tickets from a duck. It’s easy to make – all you need is a bit of hardboard and some paint (oh and a drill, so see the instructions here). Once you’ve made the duck, you push rolled-up raffle tickets into the holes which people pull out – those ending in 0 or 5 win a prize.
Carla, Maudie, Alice and Keri rifled through their stuffed toy collections and party cupboards, and baked loads of fairy cakes to give as prizes. They had a fantastic array which they spread out over two tables and the punters flooded in to have a go. Children of all ages love it because they have a pretty good chance of winning something soft and fluffy or deliciously tasty…
31st May 2008
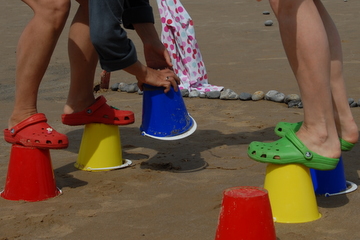
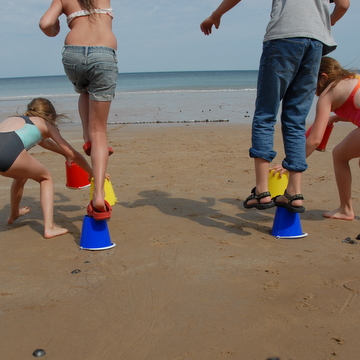
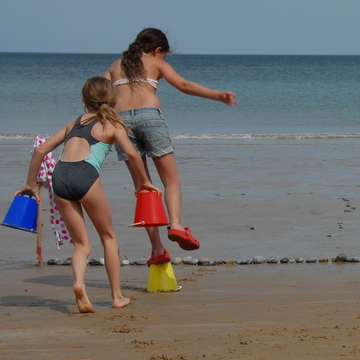
Jane: It’s the last day of half-term, and I’ve just been reading an article about how British children have the lowest level of wellbeing in 21 developed countries, according to UNICEF. Our children are apparently now almost captives in the home – the distance they can roam without an adult has dropped by 90 per cent in 20 years – and spend hours on their computer or watching TV in lieu of real adventure and challenge. It's true: when I was nine, I remember taking two buses to school across the city by myself, whereas I still walk my nine-year-old (who could easily handle it herself) the short journey to her classroom door every day. As parents get busier, the level of communication between adult and child becomes functional – ‘It’s time for tea’, ‘Is your bag packed for school?’, ‘Do this, do that’ – apparently making interaction a one-way ticket which increases children’s stress levels and makes them feel constantly bossed around. The answer, says the author, is to put children under less pressure to achieve and give them more room to explore, play and create…
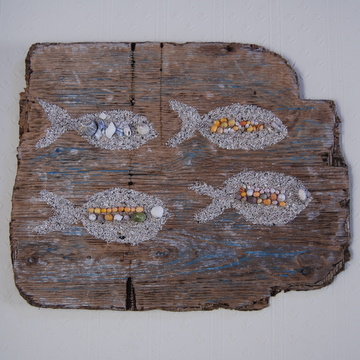
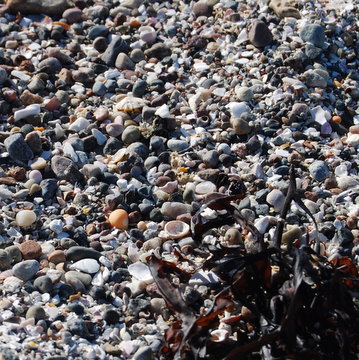
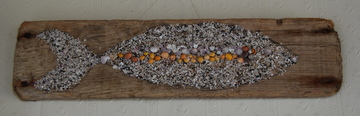
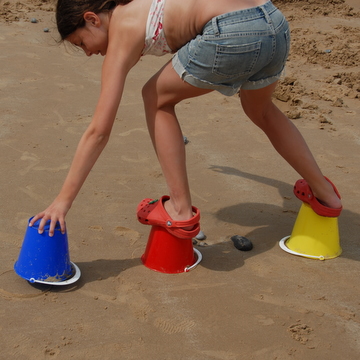
Create is a word I like and to improve our worst-in-the-developed-world wellbeing, we decided to create some natural sculptures with wood, sand and shells. We beachcombed loads of smooth pieces of driftwood, some large, some small, plus shells of all colours and shapes. You can make any mosaic you fancy – fish, snails, trees, dolphins, cows, whirls, patterns – all you need is some clear wood glue and a paintbrush.
Take the driftwood, banging a hole at each side with a hammer and big nail if you want to hang your sculpture later. Outline your chosen shape with a pencil, then paint inside the edges and fill in the middle with a layer of glue. Press an even thickness of sand on to the glue – if you’re clever you can stick darker sand around the outline to give a solid edge to the shape. Shake off the excess sand and leave to dry for a while. Then decorate your shape with shells or flotsam. Paint on another thin layer of glue where you want to give eyes or fins, or outline a backbone with a pattern of tiny coloured shells. Allow to dry. Then hang on your wall to remind you that it’s good to explore, play and create.
11th May 2008
Jane: Just been with Edie’s class on a school
trip to Grafham Water, a nature centre where the children had a fantastic day
mountain biking, orienteering, climbing on low ropes and following a trail
blindfold through the woods. In one of the quiet moments (there weren’t many)
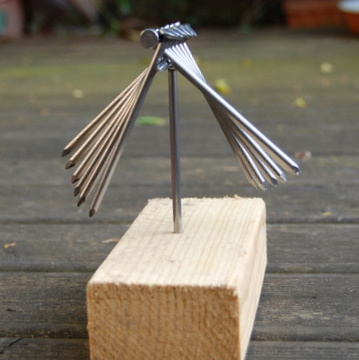
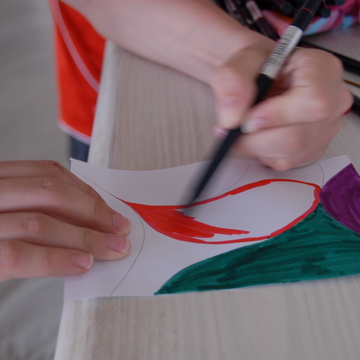
our lovely, friendly instructor John set us a challenge: could we use our skill
and initiative to place 14 nails on top of a single nail banged into a block of
wood? He gave us the equipment, and we divided into groups to solve the
puzzle. It was baffling. We tried turning the block
upside down then propping the nails beneath – the block fell over and anyway
that hardly counted as being ‘on top’ of the nail. We tried to build a nail
tower on the head, but that was as unproductive as guessing how many angels can
dance on the point of a needle – they all just rolled off. Eventually, our
group used our skill and initiative to… ask another instructor for the answer.
He sweetly showed us how:
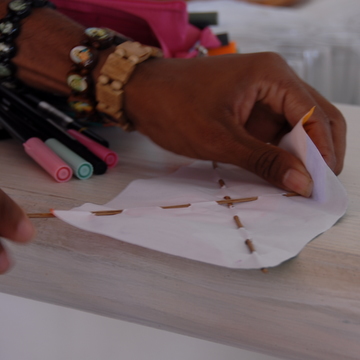
First, you lay a nail on the ground. Then you place the other nails on it at right angles, fanning out each side as if creating the oars in a Viking longboat. The nailheads have to butt tight up to each other, and to the head of the bottom nail. When you have six ‘oars’ each side (that’s 12 nails) on top of the bottom nail, place the final nail on top, with its head at the opposite end to the bottom nail. Then holding the two outer nails, gently, gently lift the whole structure, keeping the nails together as tight as possible. Balance the bottom nail on top of the single nail on the block. The structure will stay there because the weight of the nails on either side works as a counterbalance, holding all the dangling nails in place.
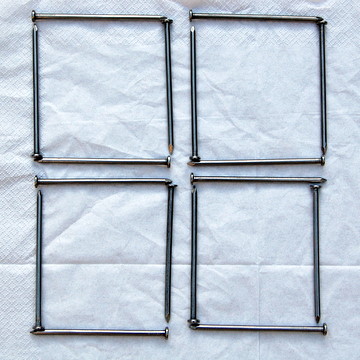
Then
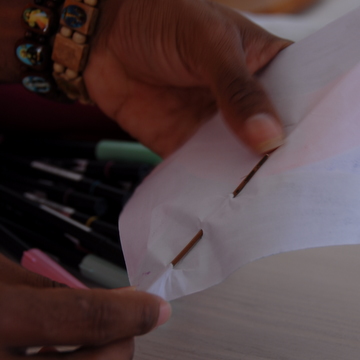
Edie’s teacher came up with another brainteasing nail trick. She laid out four squares of
nails and asked us to turn them into a shop by moving just one nail. Some of
the children tried to make a shop’s floor plan, others tried to spell the word
‘shop’. Again, we admitted bafflement.
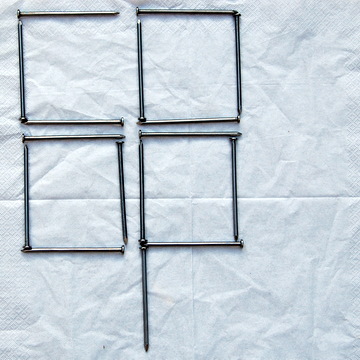
The
answer was to take the right-hand nail from the first square (to leave a ‘C’)
and put in under the last square (to make a ‘P’) so the word spelled is ‘Co Op’
– which of course, is a shop. Very clever indeed! 5th May 2008
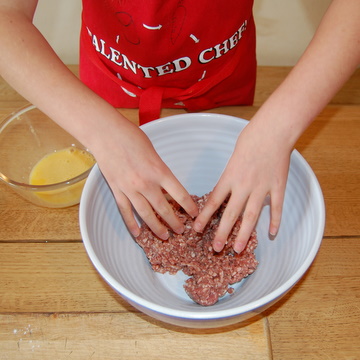
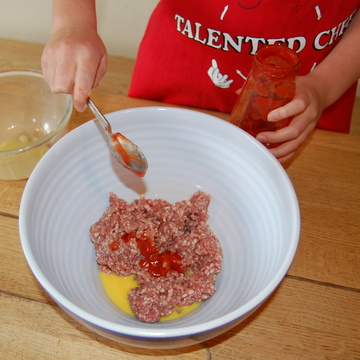
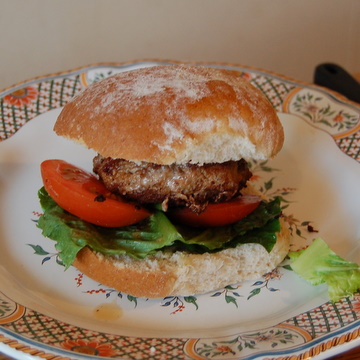
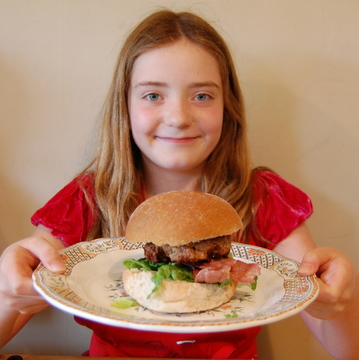
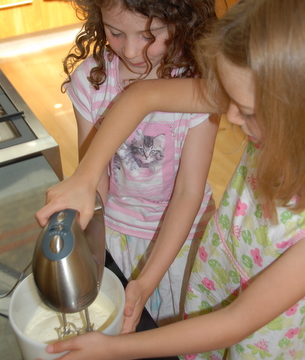
Jane: At school last week, Maudie learnt how to make burgers and was keen to cook them for us in a special Saturday night dinner before our weekly date watching the Nancies twirl and sing in 'I'd Do Anything' (we're all hoping that Jodie or Niamh will win). Maudie took our orders: we had a choice of burgers with bacon and cheese, lettuce and tomatoes, and she thought we'd also have corn on the cob on the side. She kept saying how easy it was – all you need is some mince (we used lamb mince), an egg and a squirt of tomato sauce.
First she got a big bowl and put 500g of mince in it. Then she beat an egg and
poured it over, and added two tablespoons of tomato ketchup. (This is a good
time to add salt and pepper if you like.)
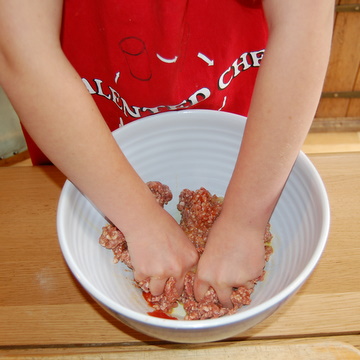
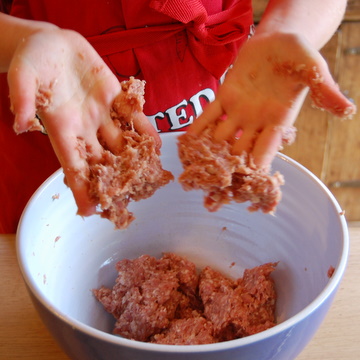
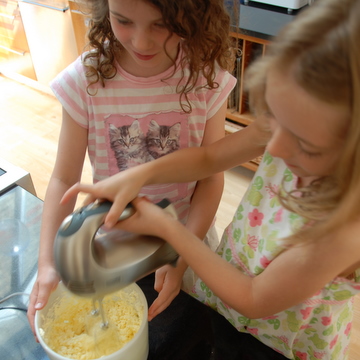
She squished the whole lot
together with her fingers…
…and got
lovely and messy.
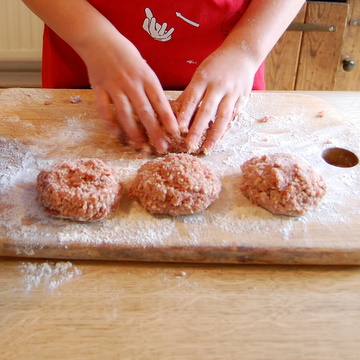
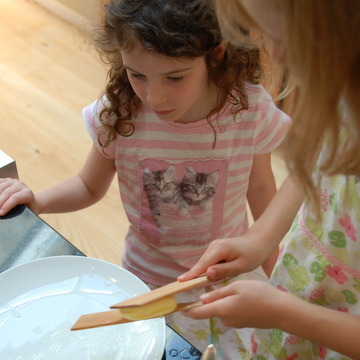
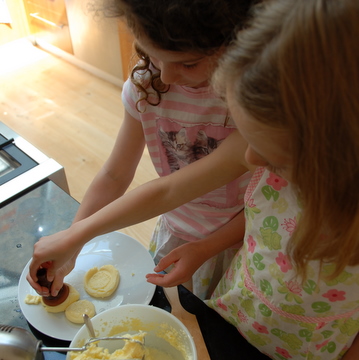
Then with
a bit of flour on a board, she rolled them with her fingers into four burger-shaped
patties.
She
heated some vegetable oil in pan, and fried them for about 8 minutes on either
side until they were cooked – the fat splashes a bit, so adults might want to keep an eye on this bit. Meanwhile the rest of dinner was got underway. The bacon went under the grill; the lettuce and tomato were washed and chopped; the corn cobs put on to boil; the buns were cut in half. Timing is everything and this was coming to a culinary crescendo at just the right moment!
Two of us
wanted melted cheese, so Maudie placed our burgers on half a bun, slapped the
cheese on top and put them under the grill. Then she made up the other burgers,
one with bacon, put them on plates, and dished them up with the corn in a
separate bowl.
We all
sat down with sighs of delight to a meal that was delicious, especially with a
big squeeze of ketchup in the middle of the bun. This was the first-ever dinner
that Maudie has made us, and she enjoyed it so much she’s keen to do the whole
thing again next week. And so are we! 27th Apr 2008
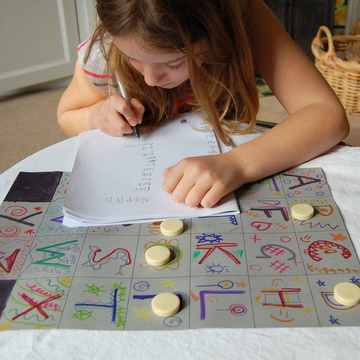
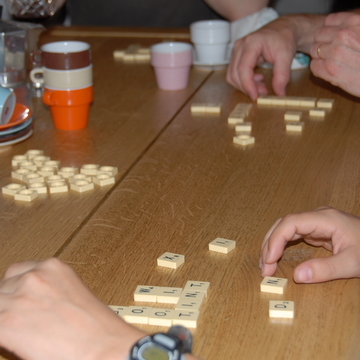
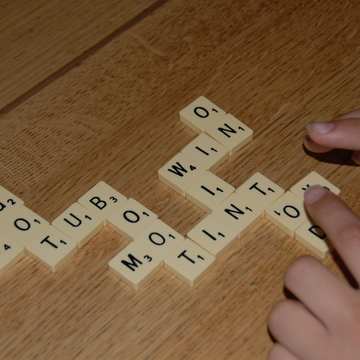
Jane: I've always loved playing word games but have a hard job to get anyone else in the family interested. They'd rather play Apples to Apples (great with lots of people) or current hot favourite 221B Baker Street (a retro Sherlock Holmes mystery-solving board game where the detecting is surprisingly hard). So this weekend I concocted a word game which pretends at first that it isn't a word game because it involves lots of colouring in. I've called it Alphabet Soup and it's really simple for all ages over about five to play.
First you draw the letters of the alphabet on a sheet of A3 paper and ask the children to decorate them so they look beautiful. One person then rolls five counters on to the paper to land on different letters (younger children can choose just three letters to make it easier). Everyone writes down these letters at the top of a piece of blank paper. The person who rolled then chooses two extra vowels which are added to the list, to give seven letters in total. The idea is for everyone to make as many three-, four-, five-, six- and seven-letter words as they can from these letters. You can put a 10-minute time limit on it, or just wait until everyone has finished playing – it doesn’t usually take long. Some letter mixes are so tricky you can hardly make any words, while with others you’ll have columns of three- and four-letter words piling up. It’s good fun and great for learning how to spell those tricky ‘don’t sound-like’ words – for example we discovered that ‘jem’ is spelt ‘gem’ and that although ‘more’ is ‘more’ there is also another kind of ‘maw’ as well...
22nd Apr 2008
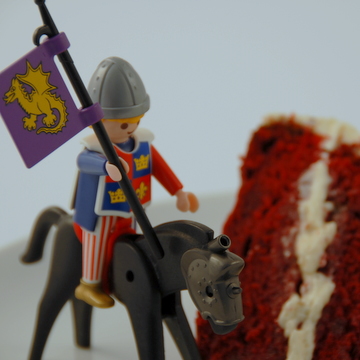
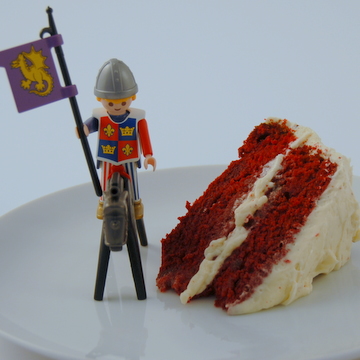
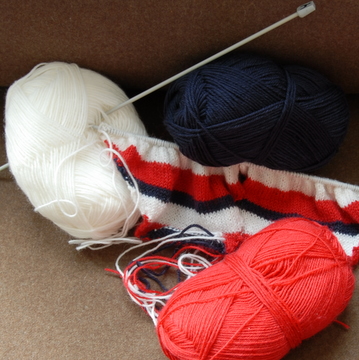
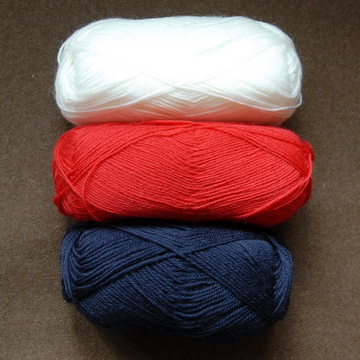
Jane: It’s St George’s Day today and duh! I only realised when I heard it mentioned on the radio this morning. In England, we’ve always been a bit low-key about celebrating our patron saint’s day compared to Wales (St David’s day, 1st March), Scotland (St Andrew’s day, 30th November) and Ireland (St Patrick’s day, 17th March, when even the rivers turn green…). But this year things are different – the red and white flag is flying over 10 Downing Street and the whole nation seems to be celebrating. So I thought I’d dash off a quick red and white cake in honour of St George and his Dragon.
I remembered the red, white and blue confections they make in the US for Independence Day and thought that a red buttermilk sponge with a thick white creamy icing would be just the thing. The icing for this cake is unusual – you make a milk and flour roux and add it to the buttercream – but it tastes, as Tamsin said, ‘yummily synthetic’. On top, decorate it with a red criss cross for St George’s flag, or a toy knight and dragon!
PS: St George isn’t really terribly English – he was probably a Roman soldier who was martyred in Palestine in the 4th century for his Christian beliefs – and during the middle ages his story became linked with a legend about a soldier who slayed a ‘dragon’ in Libya. Still, he's ours... 16th Apr 2008
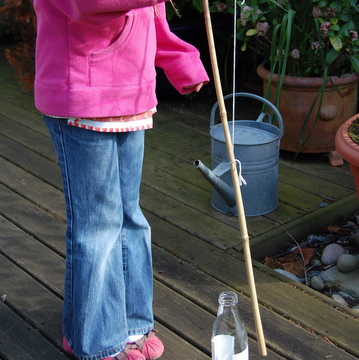
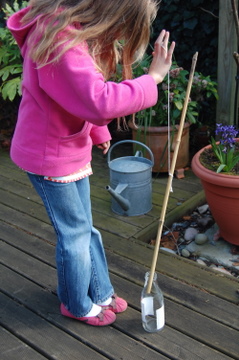
Jane: Today Edie and I braved the bright blue chill of outdoors to play a game called Stick & Bottle. The game came from a 1960s’ party book and looked easy, we thought, until we started playing it. It was a gusty day, which I wouldn’t mention except when you’re trying to ease a long stick hanging from a string into the narrow neck of a glass bottle, every little whimper of wind can send you askew.
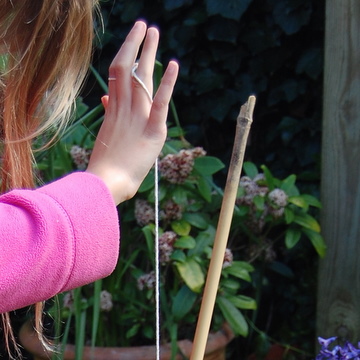
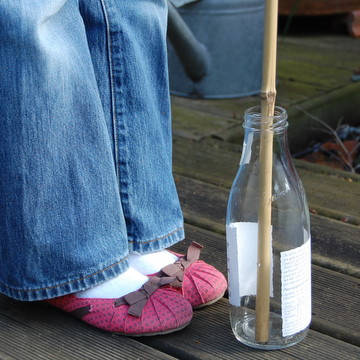
We choose an elderflower cordial bottle with a wide neck (rather than a narrow milk bottle) to maximise our chances, and dug out a piece of old bamboo garden cane from the shed. The idea is to tie the string exactly in the middle of the cane, so it doesn’t naturally tilt down at one end. I tied Edie’s index finger tightly on to the other end of the string, then checked my watch and timed how long she took to get the rod into the bottle.
The first go was tricky. The cane was wobbling all over the place and intense concentration and steady arms were needed to hold and tilt it in. The wind didn’t help: every time she was about to tip the end over, a gust blew and she let out a frustrated shriek. Time: 2 mins 24 secs.
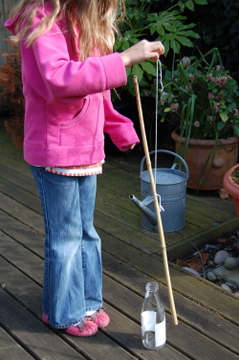
By the second go, she’d got the hang of it. There’s a method: you walk over, let the rod swing round for a few seconds above the bottle until you’ve got your eye in, then quickly drop the end in. You might need a couple of goes, as she did here. Time: 25 secs.
By the third go, with a lot of luck and very little wind, it was down to 7 secs. Now that's what you call speedy, Edie.
3rd Apr 2008
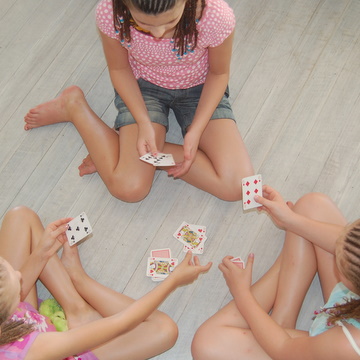
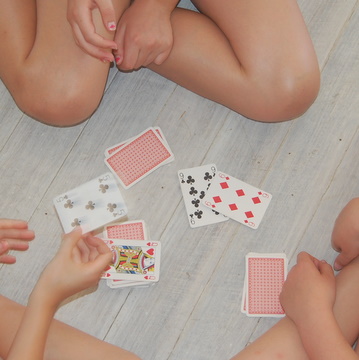
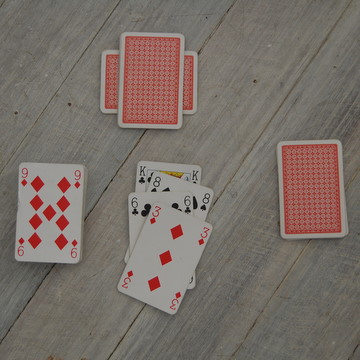
Jane: the children have become addicted to a new card game. Well, two actually. The first is rummy, the second is a very engaging game called Oh Hell! which we've renamed Darn 'n' Dash because everything can go wrong in an instant and when that happens I always shout 'darn and dash' very loudly and it caught on.
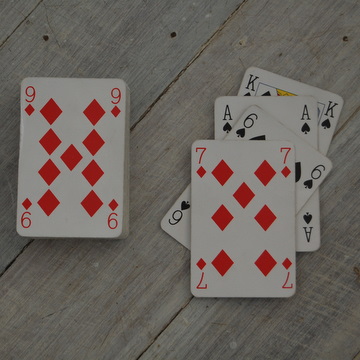
It’s a good game for everyone in the family to play, over the age of about eight. It’s basically like whist – you win tricks and there are different trumps each round – but you have to guess beforehand how many tricks you’ll win per hand, and only score points if you get it right. That can be surprisingly tricky and means you have to learn how to lose hands as well as win them, which can be quite a challenge. The excitement builds in every round because everyone starts with a single card in the first round, then gets two in the second, three in the third and so on until you get a full hand of 10 or more cards (depending how many people are playing). At the end you tot up your scores (which makes this good for maths too) and the person who has the highest wins.
It’s been great playing it but even better watching the kids sitting on the floor in a circle several times a day, shouting and laughing excitedly as the hands go down and they win or lose – and losing hands can bring as big a shout as winning, while winning can bring a disappointment if it means going over the estimated number of successes. You never know if a ‘darn’ or ‘dash’ is for a winning or losing hand…
30th Mar 2008
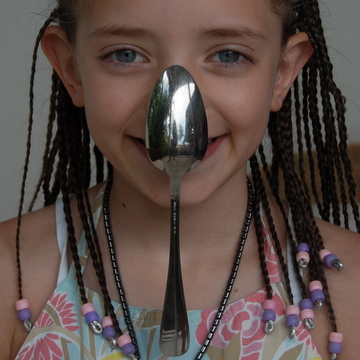
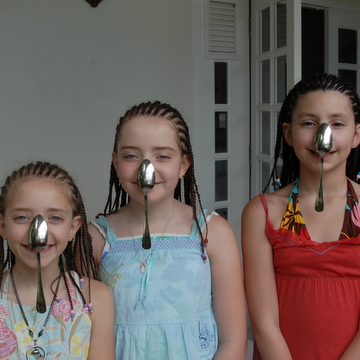
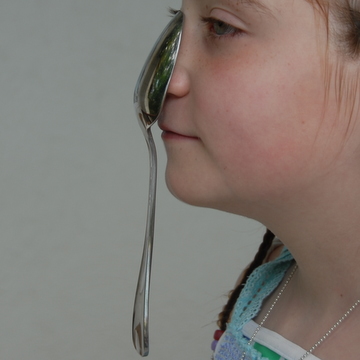
Jane: We were sitting round at dinner the other night when Maudie hung a dessertspoon from her nose – a very funny sight. It was quite a large, heavy spoon, the bowl fixed to the end of her nose with the handle dangling down, and it stayed there for a good 15 seconds before it fell off. So immediately everyone started trying to hang spoons off their noses.
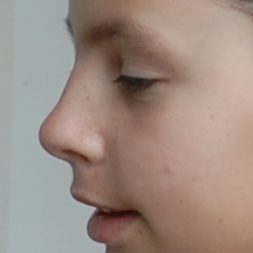
Edie, Carla and Maudie could do it really easily, while the rest of us found it impossible.
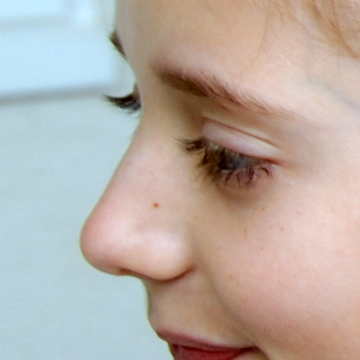
In fact, Maudie could just put a spoon on her nose and it would stay there like a magnet, while the adults tried rubbing them, breathing on them, warming them in our hands so they stuck better, but it made no difference – they fell off in about half a second.
We came up with a few wild theories – could it be the round shape of the girls’ noses, or the fact they have a soft not bony tip at the end, unlike the adults? Was it something to do with a spooky spoon-attracting substance under-11s have on the end of their noses? Weird – we’d love to hear if your kids have this strange talent too…
27th Mar 2008
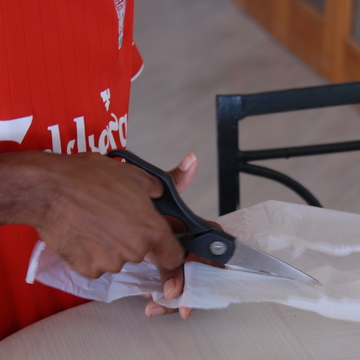
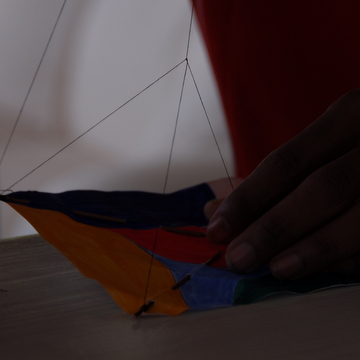
Jane: Forget about buying expensive kites – today with the help of Alex, who’s been making kites since he was a kid, we learnt how to make an excellent kite from scratch using a bit of paper, some cotton, a couple of wooden kebab sticks and a few old plastic bags. It is pretty easy. First the kids cut out a small rectangular bit of paper each, and drew a design of their choice on each one.
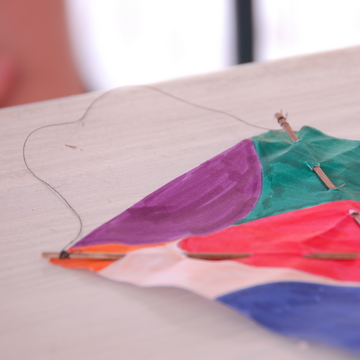
Then as if you’re sewing, thread a thin wooden kebab stick or skewer along the length of each crease.
Fold the paper opposite corner to corner so you get two criss-cross creases.
To make the hanging end of the kite, cut up old plastic bags into long strips and tie them together in a tail about 12 to 15ft long.
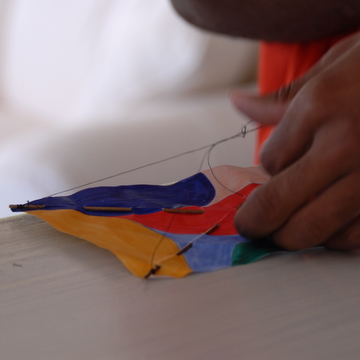
Tie a short piece of cotton (we used polyester cotton which is tougher) to the bottom corners of the kite and attach the tail in the middle so it hangs down.
Then cut three bits of cotton about 15cm long. Tie one to the centre of the two kebab sticks. Tie the others one on each top corner of the kite. Then join these three strands of cotton together in a knot at the other ends to form a pyramid.
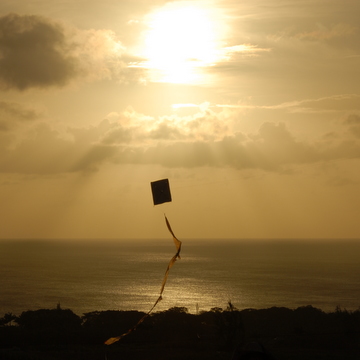
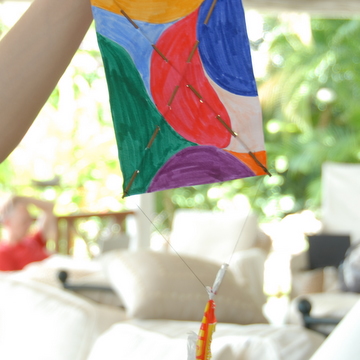
Tie the long reel of cotton to this central knot and allow to unreel. Get someone to throw the kite up into the wind – you control it by unreeling the cotton as far as you can. If the kite keeps falling to left or right, the tension in the pyramid made by the thread might be slightly askew – there is a bit of skill involved in getting this right and you might need to fiddle around with the lengths. Once it’s up and flying, Alex ties it to the washing line and leaves it to zoom around the sky all night. Quite brilliant!
12th Feb 2008
Jane: Wandering around snowy New England over the weekend, I saw these heart-shaped Valentine’s wreaths on people’s front doors. What a cute idea. These ones were very pink and red and glittery, and would be easy to make one with greenery from the garden with some red berries, ribbons and little heart motifs…
29th Jan 2008
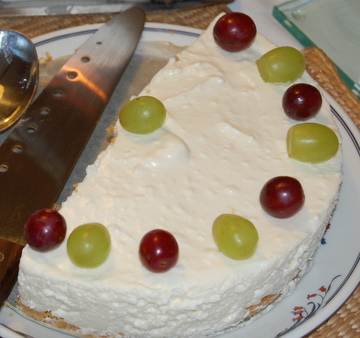
Jane: Food for me is inextricably bound up with childhood memories and emotions, which is why I love prunes and custard, beans on toast, smooth oatcakes and will happily eat muesli for breakfast for the rest of my life. I was reminded of this a while back when we went for lunch at the home of snail porridge and bacon and egg ice-cream - the very posh Fat Duck in Bray. What struck me was not how sci-fi the food was (though it was), but how it delighted my nostalgic foodie yearnings. There were sherbert fountains in those old yellow packs, licorice, tiny cornets… and on the table, a questionnaire asking us to try and remember our favourite flavours from childhood. Mine, I remember writing, was tinned Del Monte peaches with evaporated milk, which we used to have for Saturday tea. My mum used to make us steamed puddings (it was Scotland and cold), rice puddings (still love ‘em) and shepherd’s pie on a weekly basis, but the treat I remember as the highlight of the year was a refrigerated cheesecake, rich but light and fluffy, a tricky combination to pull off. Strangely, we always had it in winter, not summer, which is perhaps why it seemed so exotic. I always had seconds and usually thirds, yet every mouthful was as delicious as the one before, and even while eating it I was aware of a desperation that this joy would soon end. I guess that at the age of 12, I felt exquisitely sophisticated to be eating such a bouffant, blonde girls’ pud.
Which made me wonder: what foods will transport our kids into that nostalgic bliss when they’re grown up? Will it be pizza and garlic bread (surely too dull), a giant teacake or creamy cranachan? Grandma’s just made us her Cool ‘n’ Fluffy Cheesecake (it went down very well) and I’m thinking how nice it would be, if it ended up being that. 19th Jan 2008
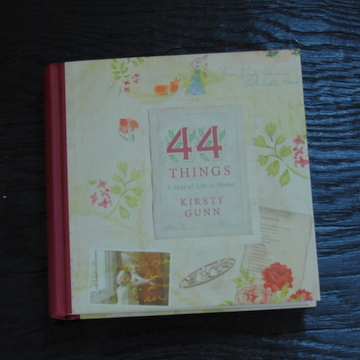
Jane: We’re thinking of putting out a Heart & Home book next year and when Mal told a publisher friend of his called Valerie, she immediately sent him ’44 Things’ by Kirsty Gunn, a collection of thoughts, anecdotes and poems celebrating the happy chaos of her family life with two young daughters. Val suggested one poem in particular called ‘Sweeping Up Stars’ would make a great introduction to our Heart & Home book. Robert Frost always said a poem starts with a lump in the throat, and Kirsty's poem (reprinted below) did it for me… Sweeping Up Stars
Not perhaps so strange, or so bizarre that I should find myself again down on my knees and sweeping up with dustpan and with brush the crazed remains of yet another afternoon of glitter and of glue and paint, the craft of your inventions, girls, the ‘let’s-make-cards!’ beginnings or the ‘why-not-paint-today?’ exertions of a certain kind of grey-lit hour, the time when we’ve a while yet till it’s tea, and lunch, the park’s long gone… It’s only you two here and me – and makes me think, you know, consider, just how many afternoons of this will I have left in one small life, amidst the tax returns and supermarket shops and work not done and stuff that I’m aware I should be doing now while on my knees in some strange corner of the room…That I’ll not have much more of this, the chance to gather in the bits of glitter, sweep up brightness from the floor, to tip into the bin bright constellations… How much time to sweep up stars? Kirsty Gunn, taken from ‘44 Things’ (Atlantic Books) 13th Jan 2008
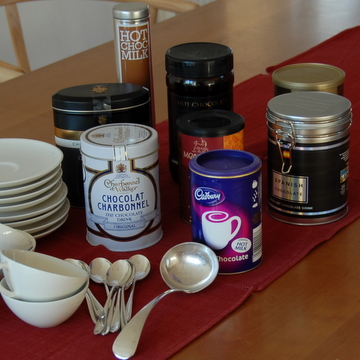
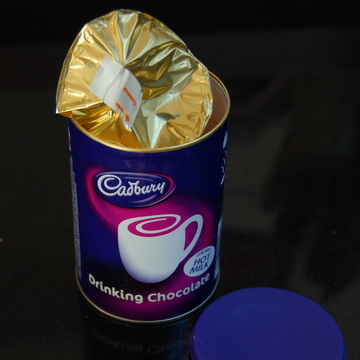
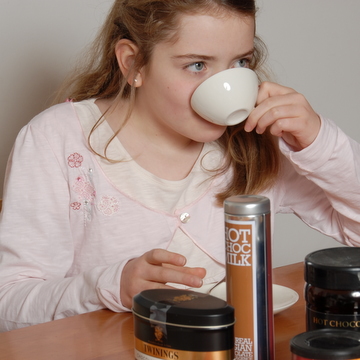
Jane: After a winter walk, what everybody in our house wants is a big steaming mug of hot chocolate. Trouble is we can’t agree on one we all like. At the moment, we’re ploughing through a huge pot of Green & Blacks which I find milky and cloying but the kids happily quaff. Tamsin and I were talking about whether there was such a thing as the perfect cup of hot chocolate and decided to find out by doing a taste test, with adults and children giving marks out of five for a variety of brands from Cadbury’s to Chocolat Charbonnel, which looks gorgeous in its chunky tin but tastes... well, read on…
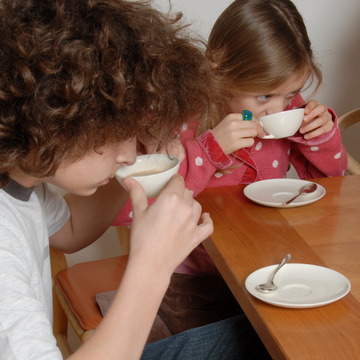
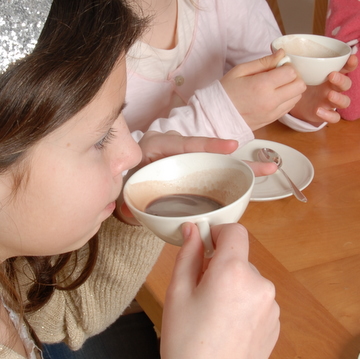
We tried out eight types, some new, some old favourites, all from the local supermarket. We followed the instructions on the box so the taste was exactly as the makers wanted. The testers were four outspoken children and three adults, and we gave each hot chocolate marks out of five – so the total any brand could get was 35. It quickly became clear we had entirely different tastes: what the kids loved, the grown-ups found overwhelmingly sweet and sickly. Our first baseline test (bringing back childhood memories) was Cadbury’s Drinking Chocolate. The kids loved it – it scored 19 out of a possible 20 from them – but the adults now found it ‘horribly sweet’ and gave it 6.5 points out of a possible 15. Grand total 25.5.
Then came upmarket Chocolat Charbonnel, twice the price and apparently consisting of flakes of ‘real chocolate’ which you mix to a paste with water before adding hot milk. Kids? ‘Urgh, it’s horrible, not a nice smell’ and ‘Yuk’ were typical. The adults liked it better, though weren’t bowled over. Total 15.5. Which just goes to show that money doesn’t necessarily buy you taste.
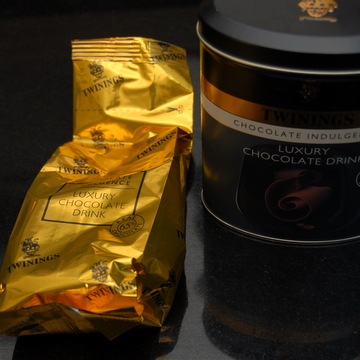
Twinings Luxury Chocolate Drink: this was a moderate hit with the adults having a rich, dark and slightly bitter tang, but the kids found it ‘too bitter, too dark’. Grand total: 16 out of 35.
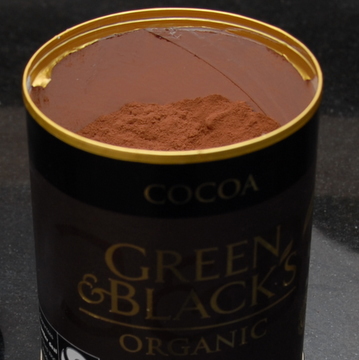
Green & Blacks: we thought this would be all-round hit (it must be the trendy organic marketing campaign), but although the kids found it more than drinkable (16 out of 20), the adults were underwhelmed: ‘Grey, too weak and milky’. Total: 23 out of a possible 35.
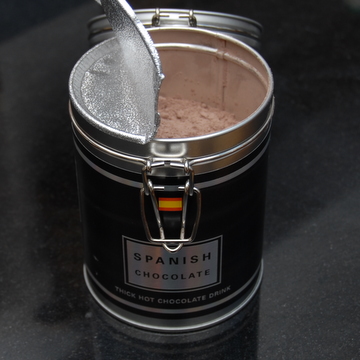
Spanish Chocolate came in a snazzy metal-flip tin and was a surprise success: its spicy cinnamon and cloves tang gave a rich complex taste in the mouth. Only Mike was less keen, damning it as: ‘Bread sauce’. Still, it got the highest overall score so far at 28 (out of 35). Good going!
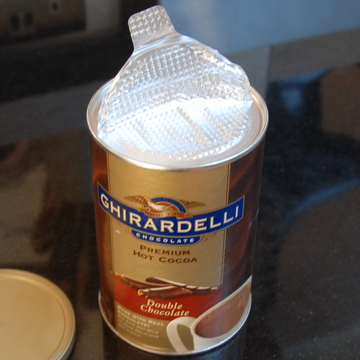
Ghirardelli Premium Hot Chocolate was another unknown brand: the kids loved it (20 out of 20); the adults were more reticent – ‘supasweet and powdery’. Total: 24.
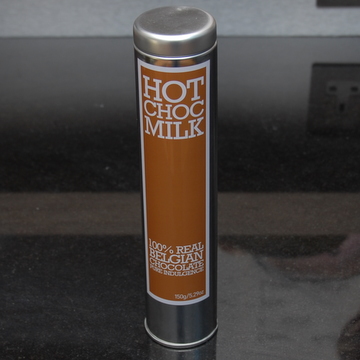
Hot Choc Milk is packaged in a tall, trendy metal tin full of ‘100% real Belgian chocolate’ and as it was the most expensive of the lot we were expecting manna. It looked like real chocolate, it melted like real chocolate, and three of the kids loved it. The other spat it out giving it ‘zero, I can’t finish this’ and the adults also found it gruesome: ‘Greasy, sickly, fatty, just disgusting. Absolutely no way would I buy this again.’ 16 out of 35.
Finally, we tried pure cocoa itself, Green & Black’s organic cocoa. Unlike all the rest, this doesn’t have sugar in it, so we added one teaspoon to every teaspoon of cocoa. It wasn’t sweet enough, so everyone put in more to their own taste. The verdict overall was good: it was easily my favourite, with a rich, full-bodied flavour. In total, the adults gave it 10, their highest score yet, and the kids 8. Grand total: 28.
Overall favourites:
First equal: Spanish Chocolate and pure Cocoa (both 28 points) Third: Cadbury’s Drinking Chocolate (25.5 points) Worst: Chocolat Charbonnel pleased no-one (15.5 points) But it was fascinating how different kids' and adults' tastes are: Kids’ favourites: First equal: Spanish Chocolate and Ghirardelli Premium Hot Chocolate with 20 points each. Third: Cocoa (18) Worst: equal Chocolat Charbonnel and Twinings Luxury (both 7) Adults’ favourites: First: Cocoa (10) Second: Twinings Luxury (9) Third: Spanish Chocolate (8) Worst: Hot Choc Milk (2) Final verdict: if you want a hot chocolate that everyone in the family will enjoy, try pure cocoa, and add your own sugar to taste. 20th Dec 2007
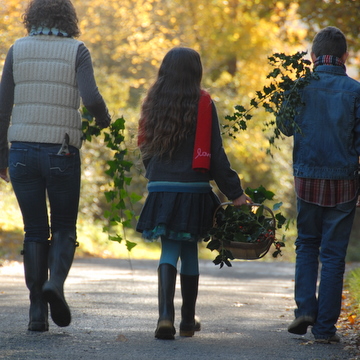
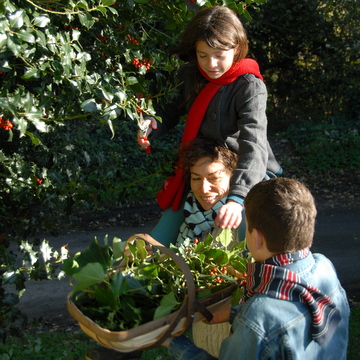
Jane: The 21st December is the shortest day of the year, and it used to be a huge celebration when people lit fires that burned all day and night, carrying over the flame from one log to another – a tradition we still honour today in a weird kind of way by eating chocolate Yule log. It was also the day when the halls finally got decked with holly and other evergreens, picked because they symbolise the eternal cycle of life. In our road, everyone’s already got their trees, decorations and lights up and they look stunning (if very, very white this year). But I always like to crank up the excitement for the kids by leaving the whole decorating thing until the last minute.
So we’re going out for a greenery walk to bring back swags of red-berried holly, ivy, bay, rosemary and laurel – and then we'll head to the market to find mistletoe and hopefully some eucalyptus boughs with berries, which smell marvellously invigorating (rather like upmarket cough sweets) hung all around the house. It's only then I feel the countdown to Christmas really has begun...
17th Dec 2007
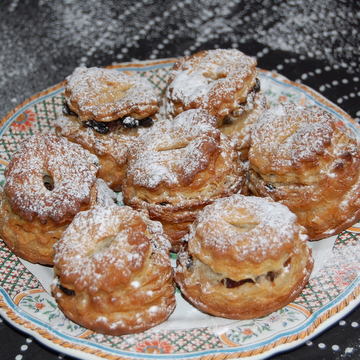
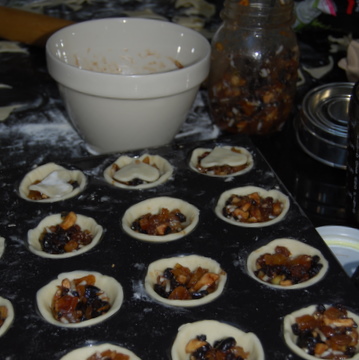
Jane: I’d always vaguely known that mincemeat used to contain meat – hence the name – but I’d never thought of making real meat mincemeat for Christmas until this year, when I was reading Paul Levy’s foodie history, The Feast of Christmas. He has a bit on mince pies and at the back quotes the 1604 mincemeat recipe of Lady Elinor Fettiplace, which sounds almost like a samosa or spicy pasty, containing the same amount of meat and suet as dried fruit, plus spices like nutmeg and mace, a bit of salt and almost no sugar at all – very different from today’s sweet mince pies.
All you need is a bit of lean mince, some dried fruit, suet and spices. The only unusual ingredient is rosewater, which you can buy in supermarkets. I used puff pastry (even though Lady Fettiplace would never have heard of it), because I love its buttery taste and tumble-down look.
As for the taste – the squeamish among you will be glad to know the meat was almost undetectable and although Paul Levy pegged these pies as being savoury and spicy, I found they had a sweet aftertaste that was much less cloying than the modern version. I thought they were fab – and a good talking point for your Christmas party. The kids didn’t even realise there was meat in them until I told them, and the shock means they’ll always remember what the word ‘mincemeat’ actually means. Ye Olde Mince Meat Pies This recipe uses Lady Fettiplace’s mincemeat, taken from a 1604 recipe, updated by Hilary Spurling and reproduced in Paul Levy’s The Feast of Christmas. I’ve cut the quantities but kept it spicy – this now makes 24 jolly decent mince pies. For the mincemeat 125g lean mince 125g shredded suet 125g currants 125g raisins 1 pinch ground ginger 1 pinch ground mace ½ tsp freshly grated nutmeg 1 tsp ground cinnamon ½ tsp salt 1 tsp sugar Rind of one small orange 3 tbsp rosewater 1 pkt frozen puff pastry (use organic Dorset Pastry if you can find it – it is easily the best), defrosted Heat the oven to 220 degrees C, Gas Mark 7. Brush two patty tins lightly with vegetable oil. Mix all the mincemeat ingredients together in a bowl with your hands, making sure the mince and suet are evenly mixed with the dried fruit. Roll out the pastry to about 3mm thick, then cut 24 rounds with a 7.5cm cutter and 24 tops with a 5.5cm cutter. Place the bases in the two patty tins, and put a heaped teaspoonful of mincemeat on each, pressing down lightly. Dampen the edges of the pastry with water, and place a top on each one, pressing the join lightly to seal. Cut a slit in the top of each pie with a knife. Place the mince pies in the oven and cook for about 18 to 20 mins, until golden brown. Cool on a wire rack and dust with icing sugar before serving. 8th Dec 2007
Jane: Christmas isn’t Christmas for me without a panic about presents. In our family, almost everyone has birthdays in November and December (including 21st Dec and Christmas Day itself) – so the idea of just going ‘Christmas shopping’ sounds an incredible luxury. We’re still bogged down in birthdays as the turkey hits the table. As a result, all questions about what the children are going to give relatives/friends/teachers are easy – it’s got to be homemade, otherwise we’d go mad and no doubt bankrupt too. There are many pluses: most homemade gifts are green or edible or both, they’re funky and fun to make, and have the added bonus of being low-cost – and like the pop group the Swinging Buildings, I’m forever ‘Praying for a Cheaper Christmas’. They’re also personal and endearing, a sure sign that thought, care and attention have been lavished around. We have a couple of rules: all homemade presents have to be quick, simple, and easy to make in bulk. So this year the children are making dinky little Chocolate Pud Truffles for their teachers, decorated with green and red holly icing on top. They’re a doddle to make and taste really good – they’re basically melted chocolate and cream, so the better quality the chocolate, the more luxe the flavour. In pretty boxes, they look fab. A friend who’s a Year 1 teacher recently said she worries about hand hygiene with her class’s homemade goodies, so this year we’re making a joke of it by putting a label on saying ‘All hands washed thoroughly before these puds were made’.
Last year, Edie made Christmas Star Biscuits in chocolate and vanilla – and a few days later, her teacher raced across to us in M&S to say how much she liked them, which I count a BIG success.
Edie’s friend Amber has perfected a chocolate chip cookie recipe that is simply one of the best I’ve tasted – if I was a teacher, I’d be looking forward to a big plate of these this Christmas (hint, hint...).
Last year Joe made Cherry Shortbread Mice, dipped cherries in chocolate with almond slices for ears and icing noses and eyes – cute, easy and speedy if you have loads of people to make gifts for. It makes you realise that homemade gift-giving is all in the presentation – wrap anything up in a sheet of cellophane and tie with Christmas ribbon and you have a good-looking present.
I remember once reading that books made the best Christmas presents because ‘they’re never fattening, seldom sinful and permanently personal’. The same is true of bookmarks – and they’re easier to make. Brightly coloured personalised bookmarks always go down a treat with the literary of our rellies.
For Jo Malone fans, this year we’re also making Honeycomb Rolled Candles. They take a bit of finicky cutting at first but once you’ve got the hang of it you can churn out lots of them quickly – they look great bunched together, tied with ribbon.
Very young children can have a go decorating plain white candles with bits of coloured wax – if you use miniature cutters they’ll look surprisingly professional even as a centrepiece on the table at Christmas lunch.
For the kids who come round, we’re making Candy Striped Pencils and hanging them on the Christmas tree so they can pick and take one home. And as a thank-you gift for Christmas parties, I’ve stashed away some pots of Herb Jelly, Quince and Ginger Jam and Cranberry Conserve that I cheated and made earlier. That’s it. We’re knackered and it’s only the 8th December. But give us a couple of days and we’re looking forward to getting going on the Christmas (and birthday) shopping proper.
Tamsin: This year my family is going to be dipping crystallised oranges and peel in chocolate and making boxes. Carla, dipping, Joe, making boxes. Joe has yet to design the container but when he does I'll put it up as you always need a box or two at Christmas.
13th Nov 2007
Jane: In the winters when I was little – four or five, says my mother, though that seems too young to recall a memory this vivid – my brother and I were given a daily spoonful of rosehip syrup. It came in a big bottle with a white plastic flip-up top, the scarlet syrup as sweet and luscious as anything I’d ever tasted. My mum says she bought it specially at the chemists for its high vitamin C content, to ward off winter colds and coughs. Other kids remember the grim slurp of cod liver oil, but we were lucky, we got red nectar instead.
They’re plentiful at this time of year and although you’re meant to wait until after the first frosts we collected them earlier, picking up a big bagful of gleaming red fruits in about half an hour flat. Boiling and straining them took a while (you'll find a recipe here), and the resulting syrup was a dull rosy colour rather than the bright vermilion I remember (early E numbers, I guess?). The taste – well, it’s different too, not as fruity, but with almost a lychee tang at the back of the throat as a gentle, pleasantly cloying aftertaste.
I was hoping the subtle rosehip flavour might work well in biscuits instead of golden syrup, but you wouldn’t know it was there in the coconut and rolled oats recipe I tried out. Better to pour it pure over pancakes, waffles, ice-cream, even rice pudding – it works well anywhere you’d reach for the maple syrup. As for me, I’m taking a Mary Poppins-sized spoonful a day while stocks last and enjoying the rosy rosehip memories. PS: Mentioning rosehips to a friend, Nigel said forget boring old syrup - as a kid he used to pick out the hairy seeds and drop them down the shirts of annoying classmates at school. Apparently rosehips seeds make the very best kind of itching powder. Which may or may not be good for some members of your family to know… 3rd Nov 2007
Jane: The celebrations come thick and fast at this time of year. No sooner have the spooks of Hallowe’en disappeared than Bonfire Night is upon us. In London, we used to invite another couple of families round and light fireworks for the children in the garden. But it always felt a bit risky and after a Catherine wheel burnt dark holes in a fence post, we gave up the homemade displays and went to a nice, safe municipal one instead. Sparklers were as risky as it got.
This was in the make-and-mend 30s, when you knitted your own swimsuits (mine is coming along nicely, thank you, see 10th Sept blog), bathing shoes and even canoes. It felt a bit like stumbling across a bomb-making kit on the internet: I flicked through the pages with shock and awe, thanking god for the great modern invention of health and safety. We’d have blown our hands off trying this. Apparently, the Crusaders brought back ‘pyrotechnic compositions’ from the East in the 13th century, and though Henry VIII was a fan, English fireworks didn’t really get going with a bang (excuse the pun) until the publication of Pyrotechnia by John Babington in 1635. The ingredients sound like an alchemist’s hit list: saltpetre, sulphur, sulphide of antimony, mealed gunpowder, charcoal, chlorate of potash. To make red ‘stars’ you need carbonate of strontia; for blue, arsenate of copper; and for green, chlorate of baryta. As well as the shellac of course. And sometimes what is called ‘dark fire’ is used to light the charge. Very Voldemort. Where did the ordinary person pick up these chemicals? Especially since 1894, chlorate of potash and sulphur were considered so dangerous by the Home Office explosives department that they were banned. Strangely enough, in my handy tome ‘Fireworks’ is followed by a big section on ‘First Aid in Everyday Emergencies’. I think this is one project we won’t be trying at home…
14th Oct 2007
Jane: In our downstairs loo, there’s a pile of Mal’s old secondhand books I’ve always ignored. But a while back when we were talking about old party activities we used to play, he pulled out one of these tattered tomes and handed it to me triumphantly. It was a 1960s book full of daft party games for adults and children - the sort you just know, no excuses, you're going to have to try out. So yesterday we had a go at Balloons within Balloons, a slightly more complicated version of balloon popping, with a group of Maudie's friends. First we had to blow up two balloons, one inside the other – which thankfully is less complicated than it sounds. We’d bought strong balloons the same size but in contrasting colours. It’s easier if you blow them up a little first to stretch the rubber, then let the air out. Push one balloon inside the other, leaving the neck of the inner balloon protruding. Blow up the inner balloon three-quarters full, then tie it at the neck. This needs a lot of puff – I could do it, but the kids found it tough. Then we blew up the outer balloon to full capacity, and tied them at the neck. We made eight of these double balloons, which took a while – when the children got bored, they ran off to find a sharp stick each, with which they would later burst the balloons. When we were ready, the kids divided into pairs. One person threw up a balloon, the other prodded it with the stick so only the outer balloon popped. This demanded quite a lot of skill and they found themselves chasing their balloon around the park, which was funny (they probably needed sharper sticks but we hadn’t brought a penknife). Although you know what’s going to happen, it’s still extraordinary to see a balloon pop and instantly see another in the air in front of you of an entirely different colour. We scored five points for each outer balloon you burst, with two points deducted if you popped both. The first team to reach a score of 15 wins. The verdict: this an entertaining game, engrossing to play and funny to watch, that you could also play indoors in a party venue – just mind those sharp sticks. 3rd Oct 2007
Jane: It was my niece Gaia’s 5th birthday and her mum, my sister Joanne, decided to make a tempting but healthy batch cake for the party. That meant introducing one of the mandatory five-a-day veggies (though a dietician I recently talked to suggested nine a day was more like it) into the cake. Carrots were out (five-year-olds can spot them a mile off), so Jo thought to tap into the latest craze – courgette cake. Subtle, green and mysterious.
Actually it’s not so green, more an ordinary Victoria sponge colour with bits in. Jo’s just had a stove and oven put in after years cooking with a Baby Belling and microwave and is enjoying her new culinary freedom: she cobbled together a big batch recipe from various online sources, and decorated it with Smarties and five candles which Gaia blew out beautifully. It was a great cake. Most of the kids gobbled it up though a few headed off towards the chocolate brownie plate instead.
But the big surprise was how much the adults loved it. Mothers came up to Jo afterwards, saying ‘Ooh, its lovely, so moist and delicious.’ Most people think courgettes are dull (though I adore them – especially grilled with oil and lemon juice sprinkled on). But in this recipe you couldn’t taste them at all – just a general yumminess and lightness of flavour that made eating the cake a delight.
The next day Jo was in Crouch End, N8, in an artisan boulanger called Coffee Cake on Broadway Parade. Among the fantastical piles of meringues in the window she saw a single plate of chocolate courgette cake, exquisitely glistening. Like buses, two courgette cakes always seem to come along… To make Gaia’s courgette cake 180g raisins 750g courgettes 375ml vegetable oil 450g caster sugar 6 large eggs 675g self-raising flour (for a chocolate version, substitute 125g of the flour with cocoa powder) ¾ tsp bicarbonate of soda ¾ tsp baking powder Soak the raisins for a few hours until fat and plump. Drain. Grease a batch tin 33 by 23 cm, and heat the oven to 180 degrees C, Gas Mark 4.
300g cream cheese 150g to 200g icing sugar Juice of one to two limes Smarties to decorate 30th Sep 2007
Jane: Pinch, punch, first of the month, and Hallowe’en suddenly seems very close indeed. I’ve been pondering what to give the trick and treaters – usually I buy multi mini-packs of chocolate bars to dole out, but this year I want something seasonal, home-made and a bit more wholesome. In one old book, I came across Apple Candy, simple and pure, just apples and sugar. You core and quarter the apples (leave the skins on), and simmer in water until they’re pulpy. Drain and puree them, then add as much sugar as there is apple puree. Simmer for an hour until it turns into thick jam. Then mix in a tablespoon of rosewater and put in a baking tray to cool.
So far so good, but then came the taste test. The kids didn't like the sludgy brown colour and when finally I got them to taste a morsel, the result was unanimous: ‘It’s okay,’ they said, munch, munching, ‘Actually it’s quite nice, but I don’t want any more.’ 26th Sep 2007
Jane: This is a brilliant, quick and portable version of Scrabble which doesn't use the board or any clever long words, so you can play it anywhere, any time and with anyone (over about six). In fact, it's so quick and unobstrusive that we recently managed a game while waiting for our main course in Pizza Express.
If you like, you can break up your words and re-make them to fit the new letters as they come along, just as you do in Snatch (if you don't know Snatch, click here). It's fantastic fun, fast and furious, and the winner (if you need one) is the first person to get all their letters into a crossword correctly or - if you fancy something more challenging - the person who scores the longest word.
14th Sep 2007
Jane: My last memory of using an underwater camera was 20 years ago in Florida. It was my brother’s (he lived there) and it was big and clunky and, even in those crisp blue waters, the images were mostly of murky blotches of wetsuit with the occasional blurred parrot fish floating by, due to slow shutter speeds, or something like that.
But now you can just buy a cheap (about £8 for a Kodak Max Underwater or Fuji Quicksnap Marine) disposable underwater camera online and have a go in your local swimming pool. S’easy: you just hold your breath, point and press. The kids love it and zoom around underwater doing funny poses and pulling horrible faces for the camera – being photographed floating two feet underwater with mermaid’s hair and floppy limbs is pretty special. They also like taking arty shots of brilliantly coloured goggles floating towards the bottom of the pool…
9th Sep 2007
Jane: I’ve just started knitting a swimsuit. I know, barmy. The notion took me while I was flicking through an old encyclopedia I found in a five-floor secondhand bookshop in Derbyshire. The book is a period piece of hearty games, sports and activities from the 1930s. For example, before you start bathing in the sea, it suggests you make your own swimsuit, bathing cap and bathing shoes, plus a bathing tent with wooden struts covered in canvas (‘designed to stand considerable wear and yet be quite portable’) in which the whole family can, without indecency, change on the beach. What natural handymanship: it makes me nostalgic for an age I never knew.
For my purposes, the bathing tent may be a step too far – after all, the kids already have those chirpy Boden towelling robes – but the bathing suit? Well, why not give it a go? The woman in the knitting shop laughed when I asked if she stocked the Sirdar ‘Sunshine’ wool specified (‘I’m old, but not that old’) and was sceptical about my chances of finding two-ply wool in any colour other than white, lemon or apricot, which are never good on anyone over 18 months. So over to John Lewis, where the haberdashery lady listened incredulously when I told her I wanted to make a swimsuit out of wool. ‘But it’ll droop to your knees when it gets wet,’ she said, with practical good sense. Still, she burrowed around until we found some fine wool in scarlet, white and navy (Jaeger Matchmaker), some size 11 needles (today’s 3mm, so painfully slow to knit on). ‘Bring it in when it’s finished,’ she said, clearly humouring the batty element of her knitting constituency. ‘Before you get it wet.’
And so here I am, following a pattern without pictures, doing the weird triangular skirty bit on the back. (Yes, there is a skirt on this swimsuit and thank goodness for that for they are back in fashion, I understand.) The knickers are separate and as rates of progress are slow, Tamsin says she'll knit those. I feel rising excitement. By around Christmas, my swimsuit will be finished and it will be goodbye Speedo! For one droopy dip, at least. 11th Aug 2007
We’ve just been on the beach playing Beach Flower Pots, which was probably invented for ‘It’s a Knockout’. Form teams of two, choose the lightest and most poised member of your team to be the flower pot jockey and then race each other across the sand without touching it with your feet by stepping on buckets (or you can use heavy stones, but that’s much harder). You need three buckets per jockey – we just used cheap plastic ones we found in a shop on the way down to the beach.
First lay out a start line and a finish line of stones - ours was only about six metres apart but at times it felt like 100. Each jockey has three buckets on the start line, and on the shout of ‘go!’ each jumps on two buckets, while the flower pot mover bends down and moves the other bucket forward so the jockey can step on it and the back flower pot gets moved in front for the jockey to step on.
You need good balance and it helps if you wear beach shoes (yet another use for Crocs…). If a jockey falls off, they have to get back on the bucket before the fall and start from that spot again. Needless to say there was some dispute over what constituted a ‘fall’ and there were some long steps over the finish line without a bucket, but it was great, noisy fun.
Then the kids had a go doing it by themselves. They each had to pick up their own bucket and move it forward, bending down and almost sitting on their haunches on the buckets to reach forward. It was slower and needed lots of control. Everyone was cheering on the sidelines (in a strictly non-partisan manner, of course).
Then the adults paired up and had another go, this time utilising the radical two-pots moved-at-once technique. Surprisingly, the hardest job is moving the pots, partly because you’re bending down and whizzing back and forward in front of the jockey so fast you start placing the pots slightly askew or at the wrong distance for their step. Meanwhile the jockey has to stand and keep their balance – which should be much more dignified, but there were no Lester Piggotts out there today. The buckets took a bit of a battering from the adults’ weight and ended up rather squished but it didn’t matter. We declined the invites to race the kids. Wouldn’t be fair to them, would it? Jane
24th May 2007
It's elderflower season again, way earlier than last year. I know because we spent last summer half-term in the Loire valley where the elderflowers were already in bloom, a week or two ahead of Britain. We picked a load of them there, and made elderflower cordial in a kitchen where the ants followed the smell of sugar in a trail across the window ledge - then climbed up into the bowl and drowned, poor things, in the liquid. I had to handpick most of them out.
That was at my friend's house hidden deep in the French countryside. (Ants don't get many sugar rushes in that quiet environment.) On a whim, she'd bought preserving sugar instead of granulated and the resulting cordial was less liquid than floppy pectin-rich jelly, delicious on ice creams and as a sauce on puds - though perhaps not quite as successful diluted in drinks. 'Cordial' derives from 'cor' the Latin word for heart and I always think there's something heartwarming and old-fashioned about elderflower cordial. Now's the time to get out there picking: the flowers are just opening out, ripe and ready - in a couple of weeks they'll start browning at the edges, and brown elderflowers make everything taste of cat's pee. You'll need about 20 fresh heads, a lot of sugar and a little citric acid (from chemists). My elderflower cordial is distilling nicely in a big preserving pan in the kitchen, giving a lovely fresh sharp smell to proceedings. Tomorrow, I'll strain and bottle it into 'Geyer Freres, maison fondee in 1895' glass bottles with pressure tops. It's hard to find solid glass preserving bottles even in kitchen shops, but Lorina's Traditional Pink Lemonade comes in these lovely ones (which almost makes them free). In fact, elderflower cordial is just about food for free, so it's strange it costs a fortune whenever you buy a slender bottle in posh caffs and National Trust eateries. Much better to make your own, and in case you need a recipe, here it is:
Elderflower Cordial 1.8 kg sugar
Shake out the elderflowers to remove any bugs, then put in a big bowl or preserving pan. Slice the lemons and add to the pan. Pour the boiling sugar syrup over the elderflower mix, stir in the citric acid, cover with a clean cloth and leave for 24 hours at room temperature. Next day, strain the mixture through muslin into clean glass bottles. Drink, diluted with water to taste. Jane
4th May 2007
We're now into summer. It's official. The cow parsley's out, the hawthorn and blackthorn are blossoming, gardens and green places are boisterous with birds and bees. May the first was actually the start of this splendid new season, though blink and you may have missed it because nobody's celebrating May Day this year until the bank holiday weekend. And probably not much then, because the old May Day traditions are all dying out. It's a great shame. In Elizabethan times, May Day was one of the biggest, most boisterous festivals of the year with processions of milkmaids and chimneysweeps gathering on every village green. Even 20 years ago, primary aged children dressed up, elected a May Queen and perhaps a Jack o' the Green, and danced round the school maypole. At university, a big gang of us used to rise at the crack of dawn, bathe our faces in the morning dew (reputedly good for the complexion) and dance round the Castle green, and Tamsin's family always got up at 4am to gather on Norwich's Mousehold Heath and watch the Morris men dance a welcome to the May Day sun (with a slap-up cooked breakfast afterwards). May Day traditions are incredible fun for the kids. Last year, we dressed up a chair with blossoms, made a blossom crown for the May Queen and raised her aloft from her throne, ruler of all she surveyed. You can make a maypole and dance madly round, twirling ribbons under and over. This year, we'll also be making creamy butter the old-fashioned way, taking it in turns to shake the jar (though you can make it in five minutes with a hand mixer or food processor). Then lathering it on to a beefy May Day breakfast of sausages or bacon and egg in doorsteps of fresh white bread. Yum!
HOME-MADE BUTTER To make around 300g butter and 200ml buttermilk, you'll need: 1 pt (568ml) double cream, at room temperature Large jar with lid Fill the jar just over a third full and tightly screw on the lid. Shake the cream up and down. After some time, it will look like whipped cream. Keep shaking until thin streams of buttermilk suddenly separate out leaving a thick, creamy lump of butter.
buttermilk off and keep to use (buttermilk cake is delicious!). Fill the jar with cold water and swirl the butter around to wash. Drain and repeat until water is clear. Put the butter on a board (if you like salted butter, mix in about half to one teaspoon salt per 100g at this stage) and press down, using a wet spatula to get rid of any remaining buttermilk. Wrap in waxed or greaseproof paper and refrigerate. Jane
1st May 2007
I like Lollo Rossa, the words as much as the lettuce. I like the way the letters roll exotically around your mouth as you say them. Green oakleaf, on the other hand, sounds more down-to-earth, solid and British empire. Combine the two, and what you have is sitting right on my patio, growing up between the cracks of the paving slabs, fighting for space among the dandelions, couch grass and other weedy intruders that normally fill these tiny crevices. Somehow, a big beefy Lollo Rossa and a delicate oakleaf lettuce have self-seeded and found a foothold together in this tough concrete environment. They first popped up about six weeks ago, and now are five inches across, amazing everyone who sees them. Last year I planted both varieties in a pot nearby, as cut-and-come-again greens for lunch. Eventually they bolted, but why the seeds took root in the patio instead of in the dark, lush earth of the border nearby is anyone's guess. Now I'm hoping these two little lettuces with their cool roots and hot heads will keep me going for a few days' lunches. Until I get to the garden centre and buy this year's new lettuce plugs. Jane
8th Apr 2007
To Scotland on the train with the kids for the Easter hols. We were staying with friends who live in Carnoustie, the small coastal town where this year's Open golf championship is happening and a few miles from St Andrews where I spent four happy (ish) years at university. The last and only time I dragged the family to my alma mater, I was running round pointing out the places I lived ('Yes, Mum, it's a house, not a terribly nice one either'), the cafe where I drank hot chocolate between morning lectures ('Great, can we have a flapjack now?'), the open-air swimming pool where we used to dive into icy Scottish seawater (Oops, now developed over) to industrial-sized indifference. But back to Carnoustie. On Saturday a bunch of us went out for an Italian dinner to celebrate Carolynda's big decade birthday. After the meal, her friend Greg handed her a tiny folded piece of paper. She looked quizzical, opened it, and almost fell off her chair. On the piece of paper was written www.carolyndamacdonald.com. Greg had built artist Carolynda her own website as a showcase for her flower paintings, with moving blocks of colour and Flash images. This must be one of those 'best-ever' presents, personal, thoughtful and taking much time, effort and inspiration to create. It was also completely unexpected. I've never heard of anyone giving (or getting) a website before and it struck me as the perfect gift for the woman who has everything. Now including her own bit of cyberspace. Jane |

|