|
A great friend of the family. Historian with a hint of wonderwoman. Has the heavy task of being Joe and Carla's 'Spelling Mother'. 12th Nov 2009
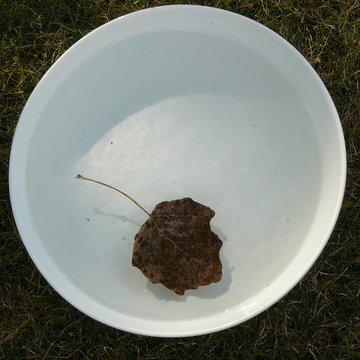
Helen: Last time I wrote on this blog about re-enacting a dead mouse, it was about making a mouse out of chocolate (see 8 January 2008, Making an Effigy of a Dead Mouse in a Mousetrap out of Chocolate-related Materials). Today, I am going to write about how to scare a friend with an impression of a drowned mouse. There is no chocolate involved in this re-enactment. All you need is a leaf and water. Maudie and Edie played a trick on me by pretending that a wet leaf was not a wet leaf but a drowned mouse with a long fleshy tail. And I believed them! Here is how you can scare someone and convince them of a dead mouse in the house.
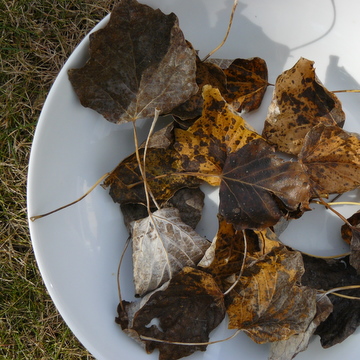
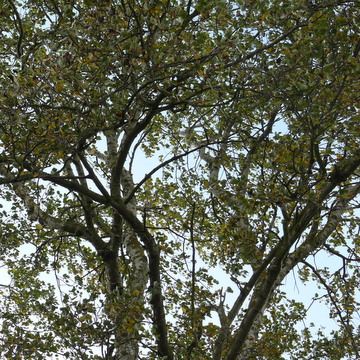
At the moment, there are many leaves falling off trees and floating down to the ground, and for this re-enactment you need to collect some of these leaves. Gather a handful of silver birch leaves selecting the ones which are crunched up and with a long stem, which are speckled brown on one side and silver on the reverse.
Now, have you ever noticed that the stem of a silver birch tree leaf can look like the tail of a mouse? Well, if not, look again!
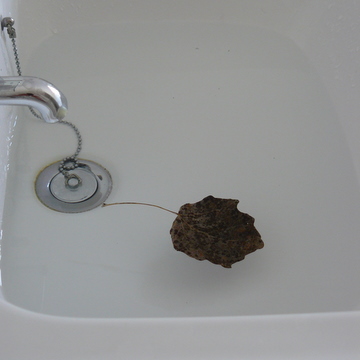
Imagine if you put this wet leaf into a bathroom sink in your house full of water or, best yet, in the toilet at your house? Leave the wet leaf in the watery grave for a while so that it sinks. Then, call to a friend or family member in a panic, saying that there is a drowned mouse in the house. They will run into the room and see what you see once you have suggested that the submerged leaf is not a leaf but a deceased mouse. Have fun!
27th Sep 2009
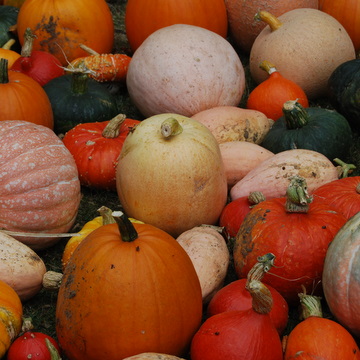
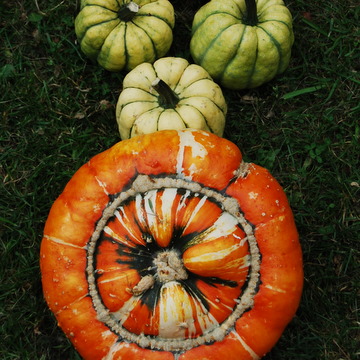
Helen: This time of year the larder is heaving with squashes – pumpkin, courgette, yellow crookneck, acorn, butternut, ambercup, hubbard, banana, trumpet, solaire, pattypan, spaghetti, fetuccini and so on. We saw an amazing display of squashes and pumpkins at Thornage Hall. Have you ever seen such a variety?
Tamsin says her favourite tasting squash is one that is just plain baked, cut in half, seasoned with a tad of salt and pepper and massaged with olive oil, put on an oven tray and baked for 30 to 60 minutes depending on the size and texture of the squash – so not an exact science. The most important thing is to bake them until they come out all toasty. Squashes cooked in this fashion are one of the best winter warmers.
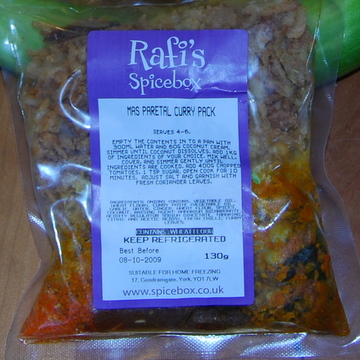
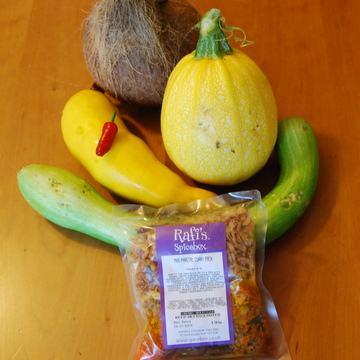
JOE’S RAFI-EMBELLISHED SQUASH EXTRAVAGANZA Joe: This is how you make an extraordinary squash extravaganza. You will need to visit Rafi's store and select one of their homemade curry packets. Go to their on line store here or have a person pop to the shops opposite York Minster and pick one up fresh from the shop. For the squash challenge, I chose a special family recipe called MAS PARETAL. Open the yummy ingredients packet from Rafi's and put it in a capacious pot on the stove and warm gently with 30 ml of a good vintage water from the tap.
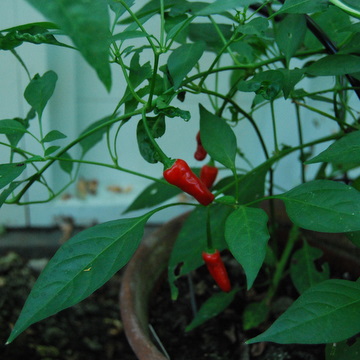
Next I went to the garden and selected the first chilli of the season. Then I photographed this delightful vegetable with the companions for this recipe: three squash, one coconut, one chilli.
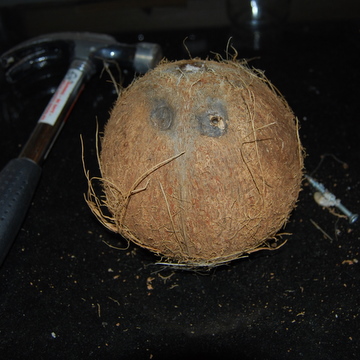
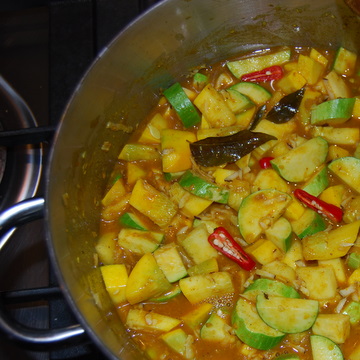
Cut the squash into small slices, add to the curry mix and stir well. Slice the chilli and add a second if you want to blow your head off. As the squash starts to cook you need to tackle the hairy fruit or seed or nut that is called the coconut.
Breaking into the coconut requires specialized skills and equipment. There are three eyes at the top, but only one will work! Whack a big hole through it and pour out the milk into the squash pot. Then comes the fun part. Wrap the nut in a cloth and let out your anger with a hammer, don’t hold back! Once it is well and truly smashed (but not too small so that chunks of coconut can be hand-held) take off the outside shell and grate the inner coconut flesh. Use the larger side of the grater to shred the coconut and add all to the curry mix.
Cook for 15 minutes stirring every so often until the squash is squashed in the mix and eat. Recommended: sides of mango chutney, lime chutney, and yogurt liberally sprinkled with shredded cucumber.
Ingredients:
1 Rafi's curry 30 ml fresh tap water 3 squash 1 chilli 1 coconut 2nd Sep 2009
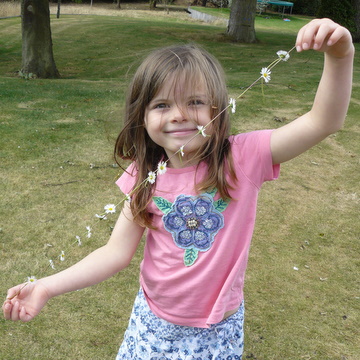
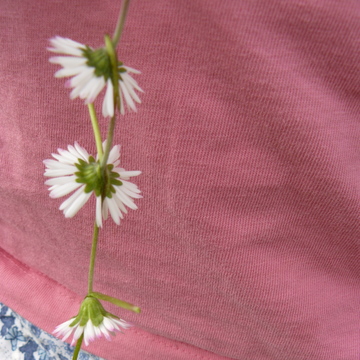
Helen: Five-year-old Hester looked with admiration at the craft projects on the heartandhome webpages and her main aim of the day was to create some artwork and contribute her own project to this website. So before I had my act together to think up what we could do, Hester had surveyed the garden and decided on a flower theme. First of all she made a daisy chain and this is her instruction on how you do it:
Hester: 'Find some nice grass with white flowers that are called Daisy. They are yellow in the middle and I find them in grass at the park and in the garden. Pick each flower with a long stem. It’s good that my Mum has not cut my fingernails. I need my nails to make a hole in the stem. This is the difficult bit and sometimes it goes wrong and the daisy head falls off. You have to make a hole in the stem so you can push the next daisy through the hole. And this way you can make a chain. If you have a few daisies you can make a bracelet and if you have lots of daisies you can make a necklace. Here is my daisy chain and this is what it looks like when it is done and then you attach the last one to finish the loop. This one is a long one for a necklace. Here it is!'
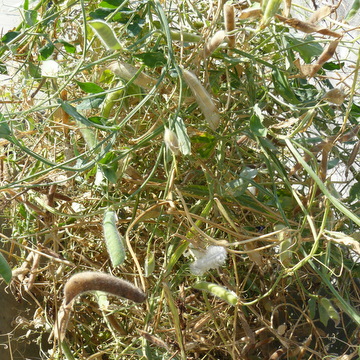
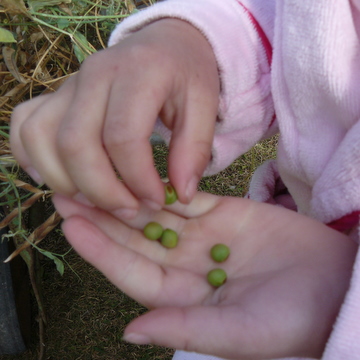
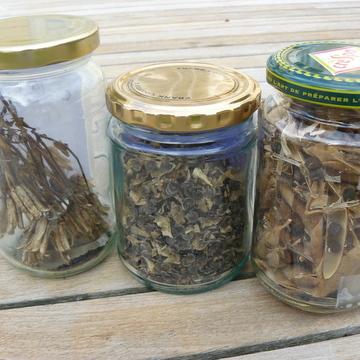
SEED COLLECTION AND STORAGE
Hester had a great time picking all the sweet pea seed heads off with a pair of scissors and collecting them on a huge tray. We put these out in the sun for an hour to make sure they would dry out fully.
Walking around the garden with Hester we found one of her favourite flowers for the spring, granny bonnets, and their latin name is Aqualegia and they are blue, purple, red, pink in this garden. We cut the flowerheads off with kitchen scissors and held the collecting tray close underneath because otherwise you lose lots of the seeds which spray around everywhere.
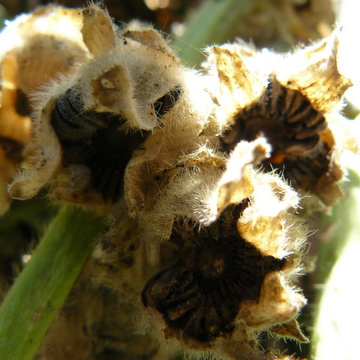
Next we found some lovely hollyhock flowers going to seed. So we cut these off a bud at a time using the kitchen scissors. Hester put her thumb in the flowerhead and turned it around in a circle which made all the seeds shake free. We collected these in another tray and put them out to dry in the sunshine.
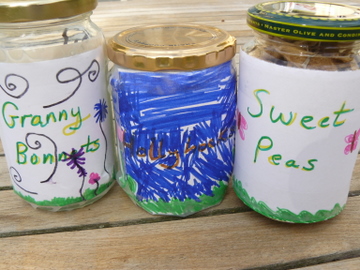
Hester really enjoyed the next part of our seed-collecting project which was to organise the containers to keep the seeds in over winter. You need to think about how to keep the seeds in a dry and dark place so you can plant them out in the garden next spring. Hester used some small boxes she found in the recycling which she decorated with spring flower labels to take home and plant in her London garden. It was very important for Hester that these containers be decorated with labels, so you know which flowers will come from the seeds you have collected.
You can also use old jars and these are the best method to keep the seeds dry for the next six months. We went through the recycling and cleaned out an olive, a marmalade and a peanut butter jar and dried them out in the sunshine too. Meantime, Hester made a set of labels with pictures of the flowers: sweet peas, hollyhocks, granny bonnets, one for each jar. These jars will go on the shelf in the garden shed here because they are for Tamsin to plant up with Joe and Carla next spring.
10th Jan 2009
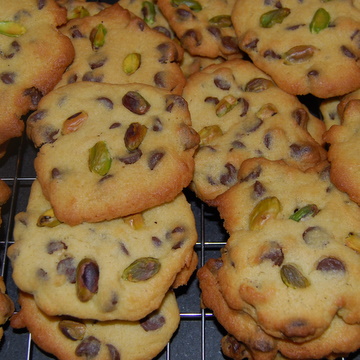
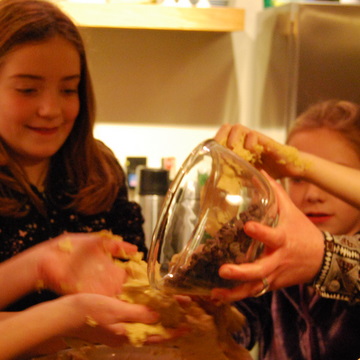
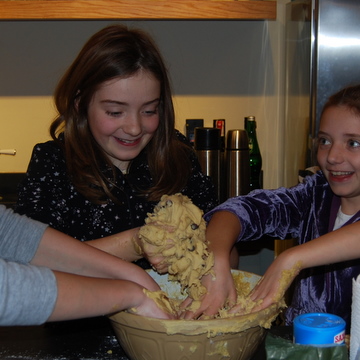
Helen: Carla was very keen to make chocolate chip cookies during the school holidays and I was even keener. The cookies travel very well and we have tested out their flavour at several locations. Firstly, in the bowl in raw state rather a lot of the cookie dough was eaten by Carla, with assistance from Maudie and Edie. It must have tasted good, because around 10% of the mixture disappeared. Secondly, once cooked, Joe tested the first cookie while still hot from the oven. This test showed that flavour is obscured by heat and does become stronger once the cookies have cooled and the choc drops are no longer in danger of burning your tongue. Thirdly, the cookies were taken to the beach to experience the seaside; a Fourthly, a batch of cookies (no salt version) was mailed to my father in a tupperware box layered in greaseproof paper and topped with bubble-wrap and not one cookie was broken by the postie. My father gave evidence over the telephone that even when he finished them on the fourth day, they still maintained flavour and texture, and so now we know that this recipe for cookies does not go stale when posted a distance of 90 miles and consumed in a leisurely manner over a period of days rather than hours. This range of taste tests has been fairly comprehensive, and shows that next time Carla and I can be more adventurous and post cookies to a range of destinations! The ingredients are given in US cup quantities – this recipe is easiest to make if you buy a cup measuring set, usually about £3 at a UK supermarket. Makes about 40 cookies. 2¼ cups plain flour 1 tspbaking powder 1 tsp salt, can reduce or avoid if necessary for heart healthiness 1 cup butter, softened to mushy consistency ¾ cup granulated sugar (can use brown) ¾ cup soft brown sugar, squashed down 1 tsp vanilla extract, posh stuff tastes best 2 large eggs, whisked 2-3 cups dark chocolate chip cookies (or mix with milk drops) 1 cup chopped nuts (optional: pecans, walnuts or pistachios are best) Pre-heat oven to 180ºC/350ºF. Mix together the flour, baking powder and salt in a small bowl. Churn together the softened butter and both sets of sugar in a very large bowl. Needs some elbow work to make smooth or you can use an electric mixer if you have to conserve your energy and are keen on a very light cookie texture. Add the vanilla extract and beat in. Lastly, whisk the eggs and slowly add in to the mixture which will make it very gooey. Gradually add the flour mixture to the butter mixture and stir in. Only once your mixture looks like cookie dough and is a butterscotch colour, is it time to add the special ingredient of chocolate drops (minimum recommended 2 cups, maximum 3 cups; and dark chocolate drops have stronger choc flavour post baking than milk chocolate drops, so this has to be carefully thought through before selection of drops).
You will see that with three sets of helping hands it may be very hard to get the required quota of choc chips if your helpers consume too many choc chips before they reach the cookie mixing bowl!
Using a soup spoon, scoop out one spoonful of dough per cookie which will make them to fit an American mouth size which equates to three bites for a typical British adult. If you are baking them for toddlers, use a teaspoon of dough per cookie so they are for small mouths. And if you wish to add nuts, this is the time to push several into the top of each cookie. Bake for 8 to 11 minutes, then remove from hot oven tray immediately and put on a wire rack to cool. If you like your cookies to be American style and sticky inside, then take out of the oven at 8 minutes because by 9 minutes they will be firm and by 11 minutes they will be toasty. So check with your consumers which texture they like best. All taste extraordinarily good! In this picture, we added some pistachios to the cookies just before they were popped in the oven. This batch of cookies did taste different because they were a no-salt version so we could share half of them with my father who is not allowed salt since his heart operation. (It did not make a big difference to the taste of the cookies.) Also, these cookies have been baked for 10 minutes to be of firm texture to withstand packing in tupperware to travel as going-home presents and for posting to my father in Oxfordshire. The cost of posting a box of cookies packed in tupperware and padded envelope in Britain was £2.50 first class: posting at 4pm in central Cambridge they were then delivered the very next morning to rural Oxfordshire and remained in pristine condition with hardly a crumb dislodged. So this proves that chocolate chip cookies make an excellent choice for a posted present!
5th Jan 2009
Helen: The sad story of the R.I.P Baked Potato Art Festival came about because we were waylaid on a coastal walk at Horsey where we were expecting a picnic on an isolated beach but instead were surrounded by nature tourists come to watch grey seals and their pups. None of us knew anything about seals and their rookery habitats on the north Norfolk coast, but after a while we figured out which were females, males, fluffy overstuffed young ones, and scraggy dead seals abandoned close to the dunes. The male seals were darker and huge and barked out at the beached females as they flopped out of the water in hope of mating, but although we watched very intently, or possibly because we watched so intently, the females barked back fiercely and did not seem at all keen on getting intimate!
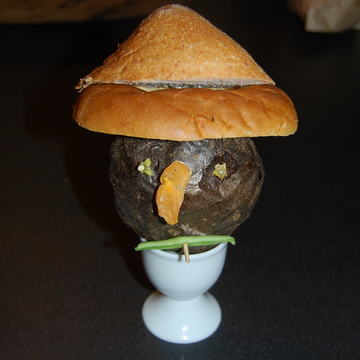
All this seal distraction meant we were back home late from our traditional New Year's Day beach walk and as we bundled through the front door our nostrils were greeted by the yummy smell of a carrot-related stew and baked pots in the Aga. Tamsin said brightly, 'I hope the potatoes aren’t burnt to a cinder' at the very moment the oven was opened to reveal the remains of our supper, their dark husks burnt to a cinder. We set about cutting one in half and the contents revealed a thick toasted crust with a very small edible kernel of pasty potato.
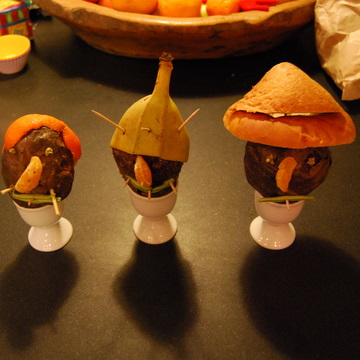
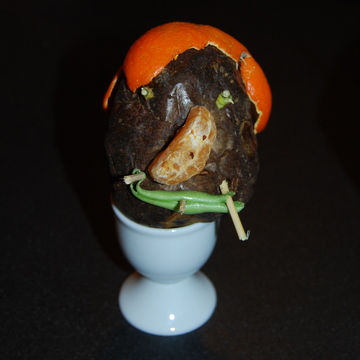
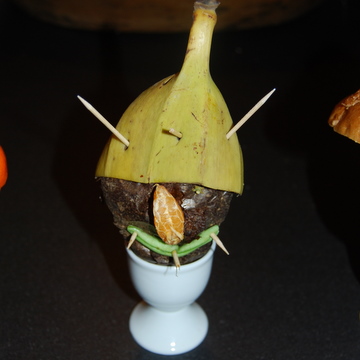
What to do? Well, the organic recycle bin had a suggestive layer of green bean trimmings on the top which were soon attached to the three potatoes that had survived in potato head form. Using toothpicks as pins, the beans were formed into grimaces. Next, noses were found from three squidgy clementine segments discarded from a breakfast fruit salad. The eyes were more of a challenge - Joe used orange stalks. The hat and hair pieces was where the R.I.P Baked Potato Art Festival came in for a creative twist and a very deep delve through the recycle bin with a variety of creative contributions from Carla, Maudie and Edie. One potato head had a third of a bagel and a corner of stale bread cut in to a Mexican sombrero, the second had a very funky pixie hat made of a banana peel end, and the third had the best-suited head gear for the blustery weather conditions, a deer stalker fashioned from clementine peelings.
The three potato heads are a symbol of optimism for 2009, that any tragedy on a domestic front can be turned around in to a triumph of ingenuity over adversity! |

|